25 Bold Red Valentine Nails That Scream Love & Confidence

Red is the ultimate color for Valentine’s Day because it represents both passion and power. Choosing the right shade can change your entire mood, making you feel more assertive and ready for romance. Whether you prefer a classic cherry hue or a moody burgundy, red nails act as a bold accessory that fits any outfit. This guide offers practical ways to get salon-quality results at home without spending a fortune. From simple accent hearts to high-shine finishes, these ideas focus on wearable art that fits your busy lifestyle.
- The Classic Crimson Gloss
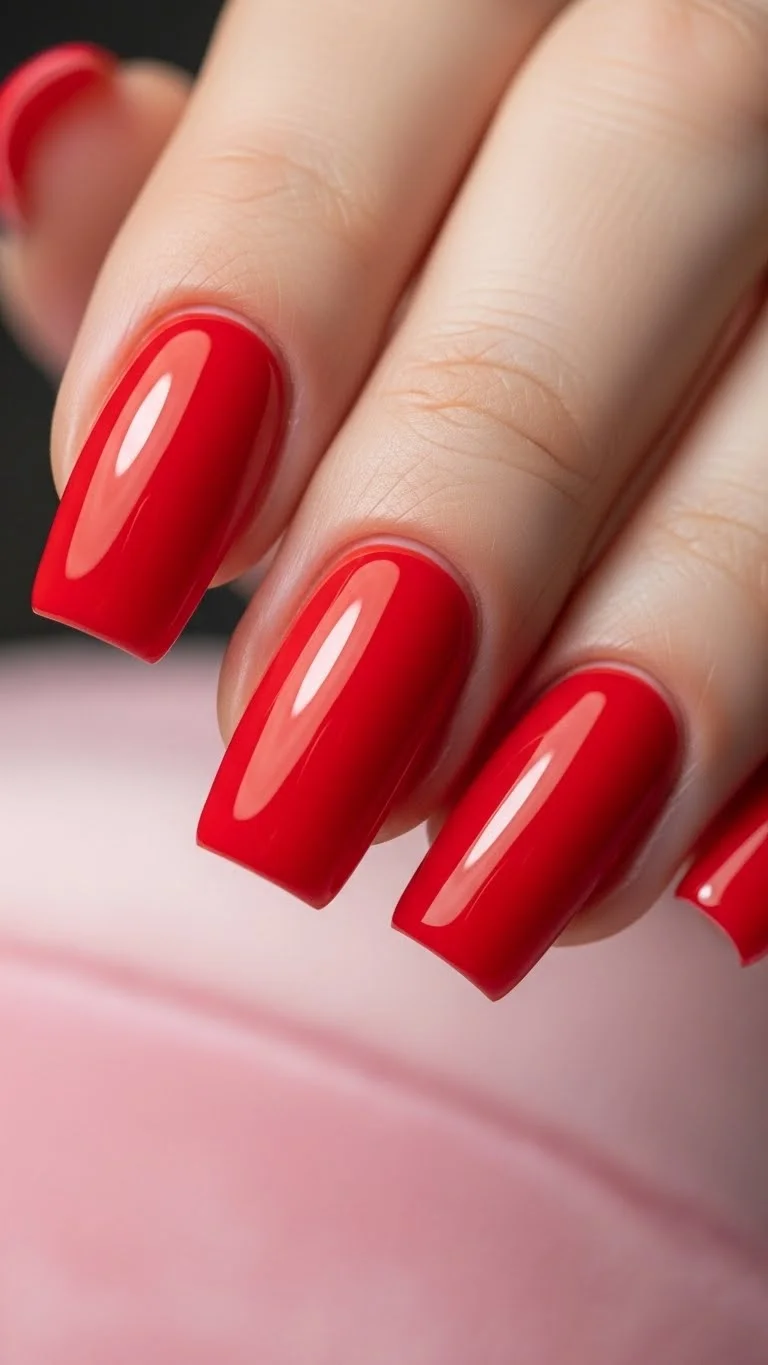
You can never go wrong with a true red polish. It is the gold standard for Valentine’s Day. This look focuses on a high-shine finish that looks like glass. To get this at home, start with a ridge-filling base coat. This creates a smooth canvas for your color. Apply two thin layers of polish rather than one thick one. This prevents bubbles and peeling. For a budget-friendly win, use a fast-drying top coat to seal the shine. You don’t need expensive brands for this. Many drugstore options provide that professional “wet look” for under five dollars. Keep your cuticles hydrated with a bit of olive oil from your kitchen. It makes the red pop against your skin.
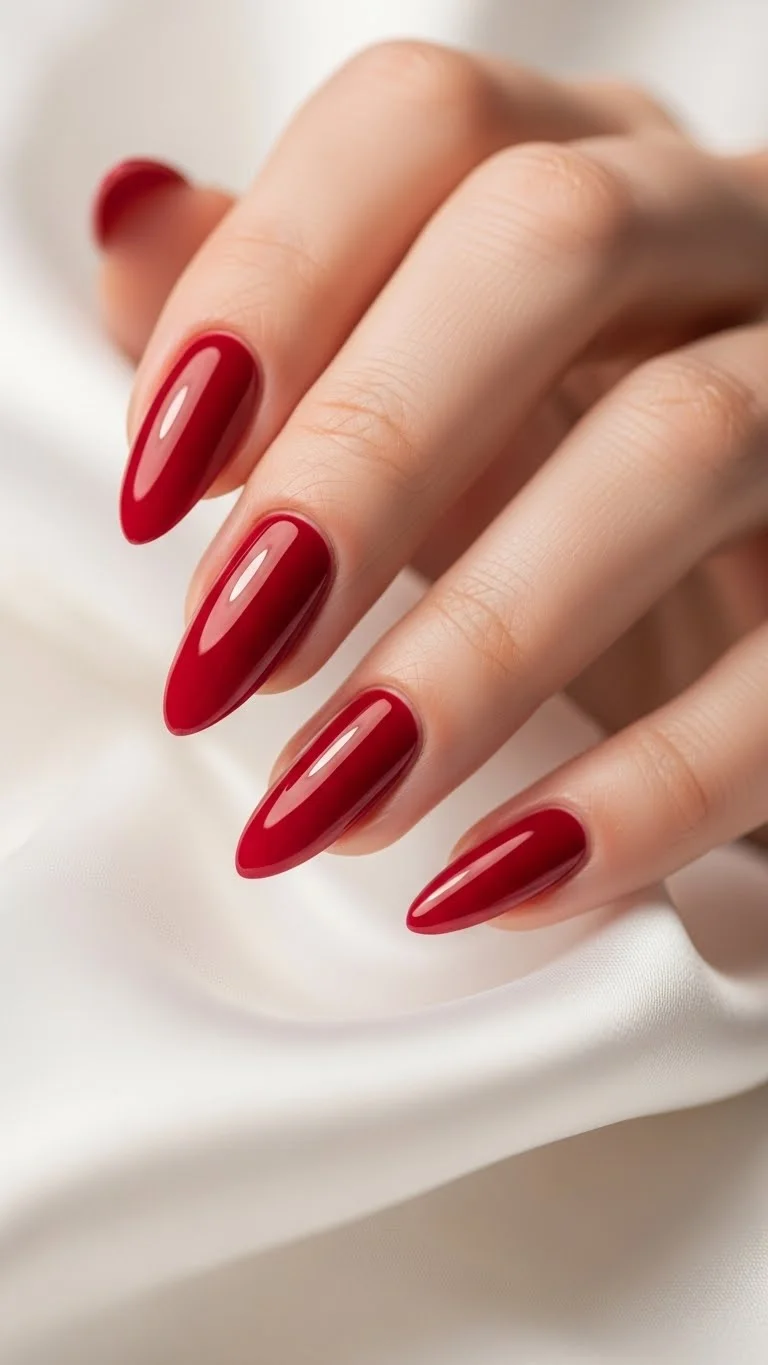
- Deep Cherry Almond

Almond nails make your fingers look longer and thinner. A deep cherry shade adds a touch of mystery to your Valentine’s style. This color is perfect for dinner dates or evening events. It feels sophisticated and grown-up. If you have short nails, you can use affordable press-on tips to get this shape. File the sides gently to create the signature almond point. Paint them with a dark red that has blue undertones. This makes your teeth look whiter and your skin look brighter. For a DIY trick, mix a drop of black polish into a bright red to create your own custom dark shade. It saves you from buying a new bottle.
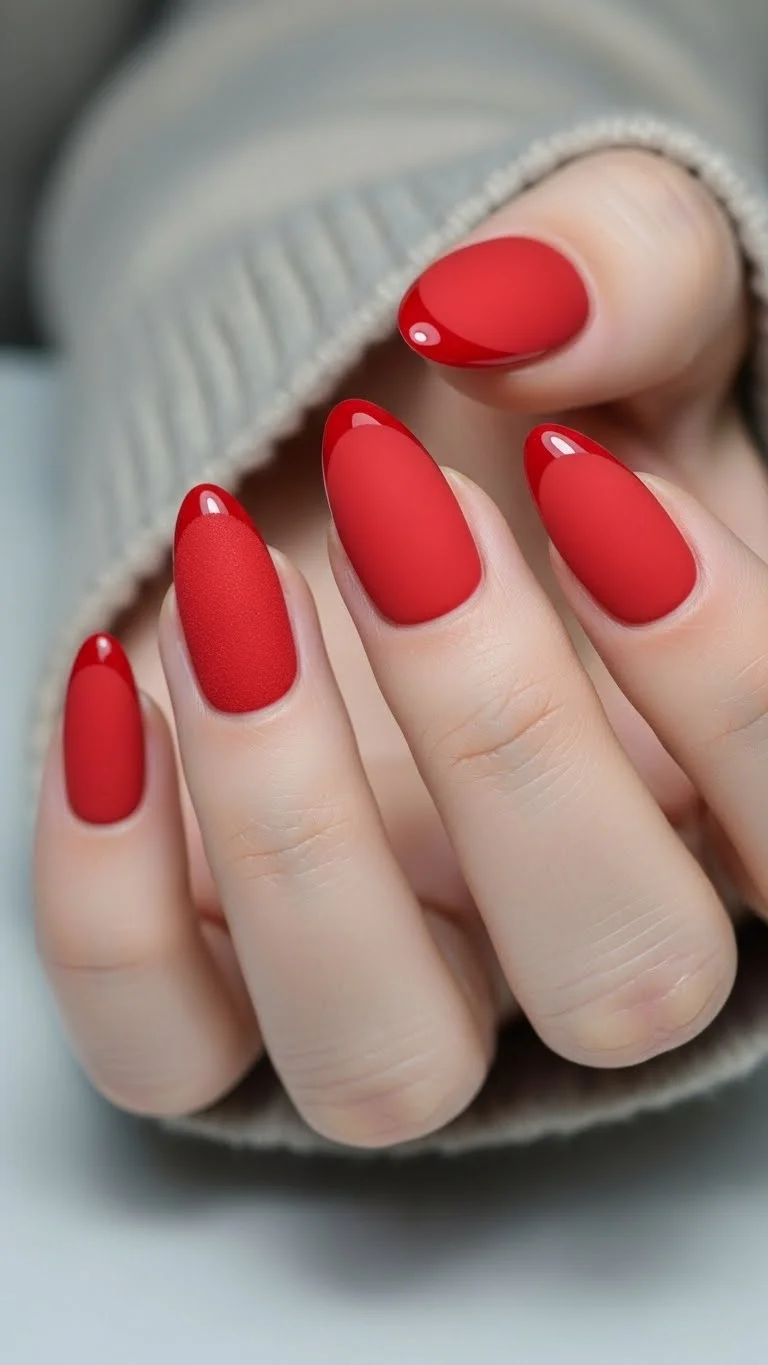
- Matte Red Luxury
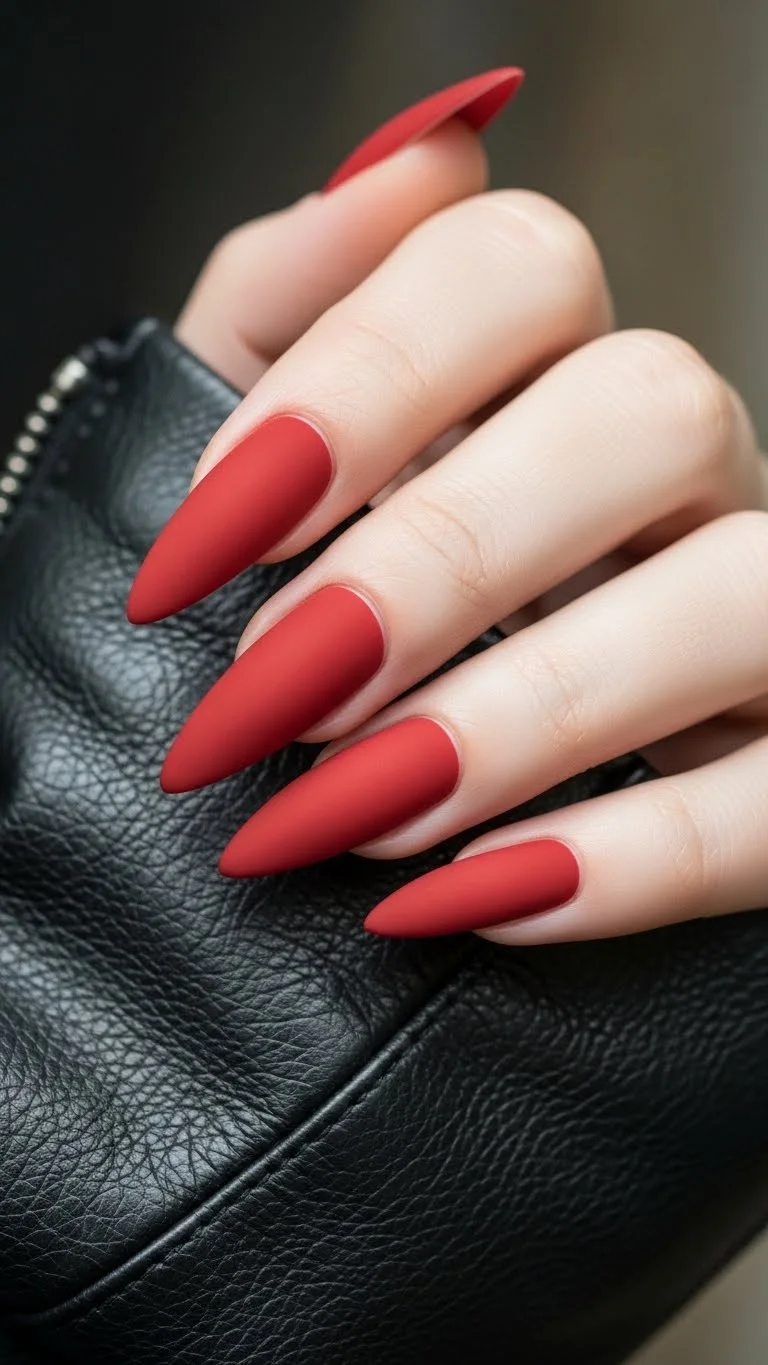
Matte nails offer a modern twist on the traditional red. The lack of shine makes the color look deeper and more saturated. It feels edgy yet romantic. You can transform any red polish you already own into this look. Just buy a matte top coat. It is a cheap way to double your polish collection. Apply your red base as usual and let it dry completely. Then, swipe on the matte layer. If you are in a pinch, some people hold their wet nails over steam from a kettle for a few seconds. This dulls the shine naturally. Be careful not to get too close to the heat. It is a quick way to get that velvet texture for free.
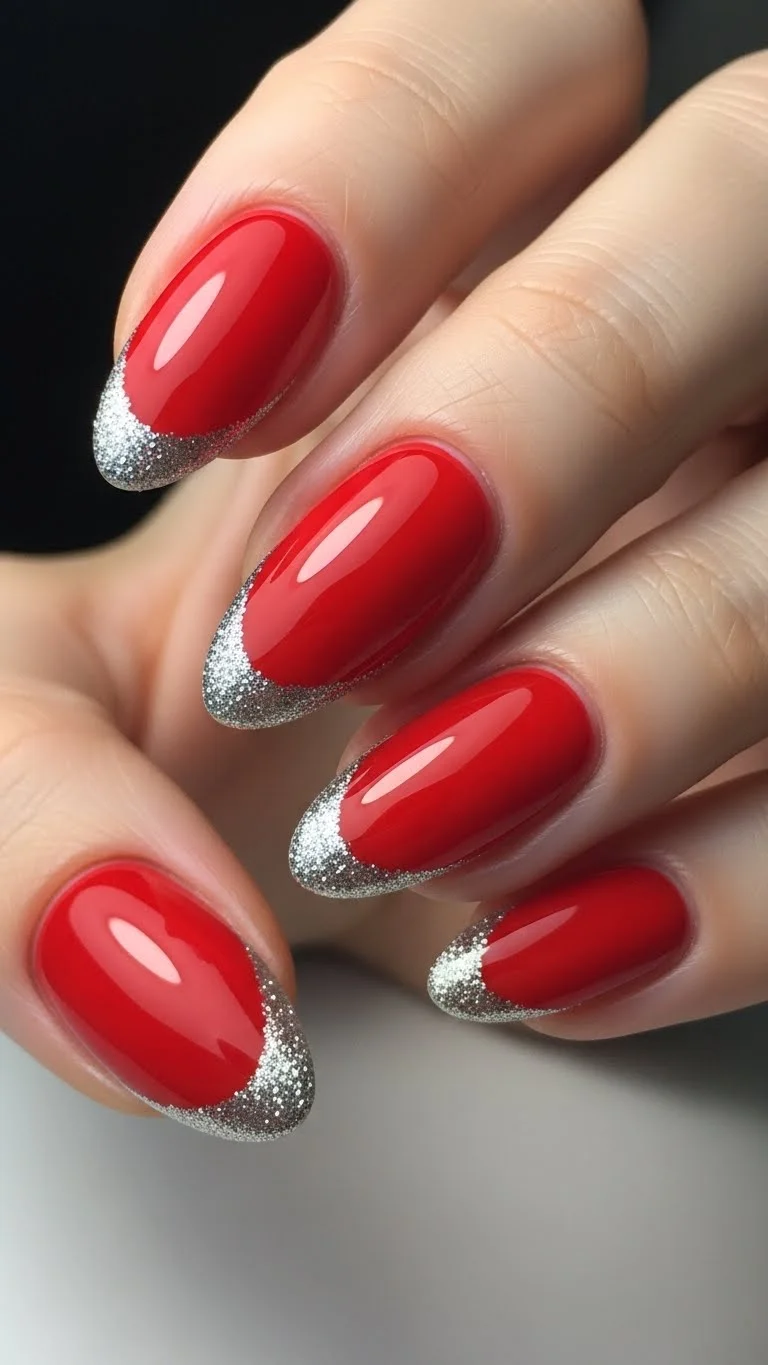
- Minimalist Red French Tips
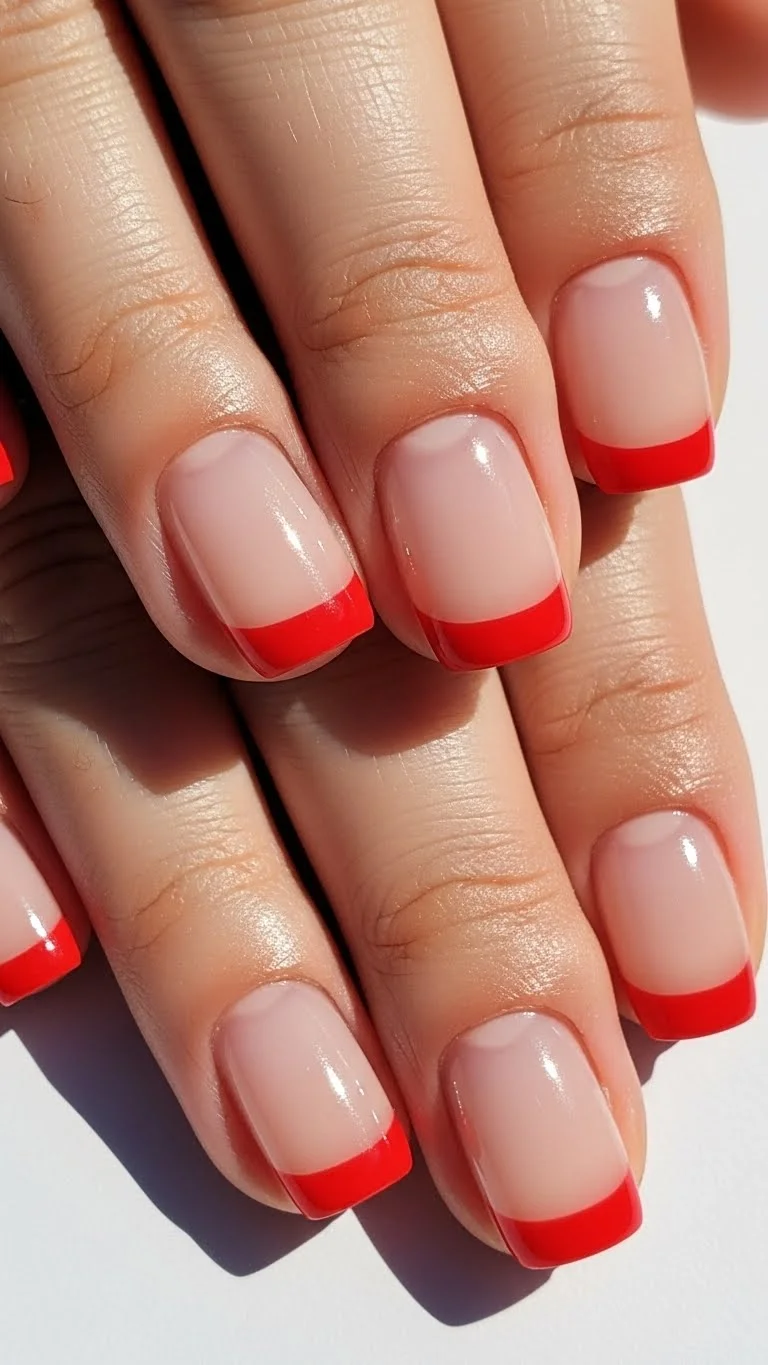
The French manicure is back, but with a fiery update. Instead of white tips, use a vibrant red. This leaves most of the nail plate clear, which makes growth less obvious. It is a great choice if you want your manicure to last two weeks. Use reinforcement stickers from the office supply aisle as a guide. Place them across your nail to leave the tip exposed. Paint the red on top and peel the sticker away while the polish is still tacky. This gives you a sharp line without needing a steady hand. It is a professional look for the cost of a few stickers. Finish with a clear coat to protect the tips from chipping.
- Glitzy Red Glitter Gradient

Glitter adds a festive energy to Valentine’s Day. A gradient effect looks more polished than a solid block of sparkle. Start with a solid red base. Then, take a small makeup sponge and dab red glitter polish onto the bottom half of the nail. Tap lightly as you move toward the middle to create the fade. This technique hides any imperfections in your base color. If you don’t have glitter polish, use loose craft glitter over a wet top coat. Just make sure to seal it with another thick layer of clear polish so it doesn’t feel scratchy. It is an easy way to add visual interest without complex tools.
- Tiny White Heart Accents
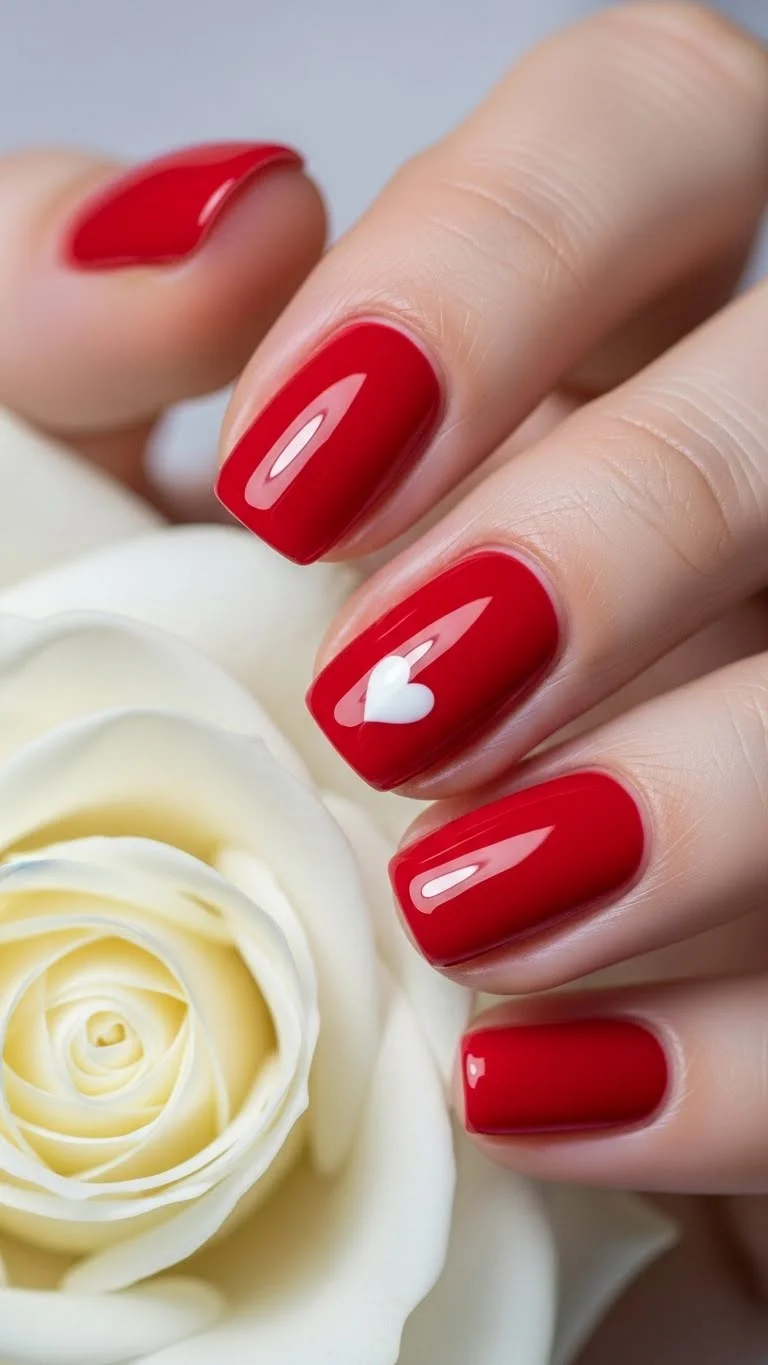
Sometimes less is more. A solid red set with one tiny heart is incredibly sweet. It screams Valentine’s Day without being too loud. You don’t need to be an artist to do this. Use a toothpick or a bobby pin. Dip the tip into white polish and make two small dots side by side. Drag the polish down into a “V” shape to connect them. This creates a perfect heart in seconds. You can put one on every nail or just use it as an accent on your ring finger. It is a zero-cost way to customize your look. This style works well on very short nails too.
- Red and Pink Color Block
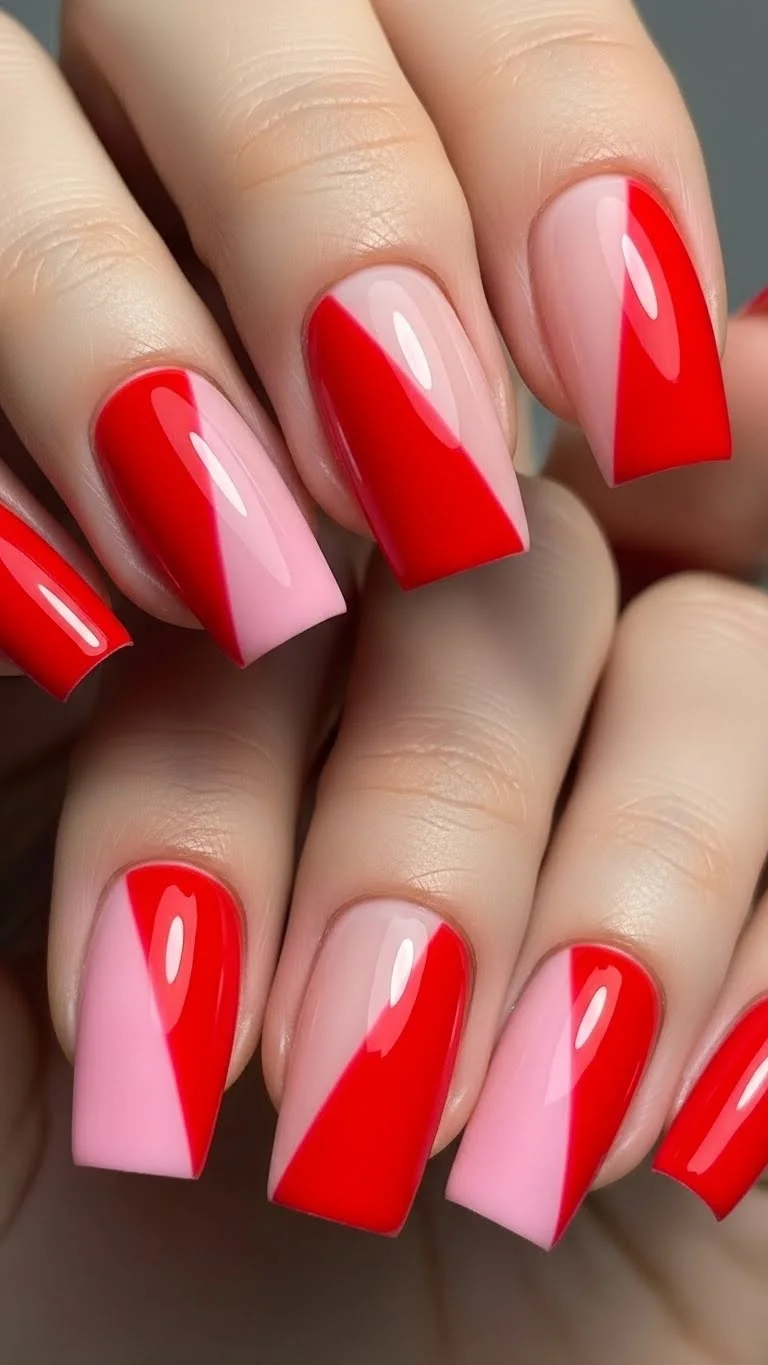
Red and pink used to be a fashion “no-no,” but now they are the ultimate duo. This color blocking is bold and confident. It shows you aren’t afraid to play with color. Use painter’s tape or Scotch tape to divide the nail. Paint one side red and let it dry. Cover that side with tape and paint the other side pink. Remove the tape slowly to see the clean line. This looks like a high-end salon design but only costs you the price of two bottles. Choose shades with the same “temperature”—either both bright or both muted—to make them look cohesive. It is a striking graphic look for a modern date night.
- Metallic Red Chrome
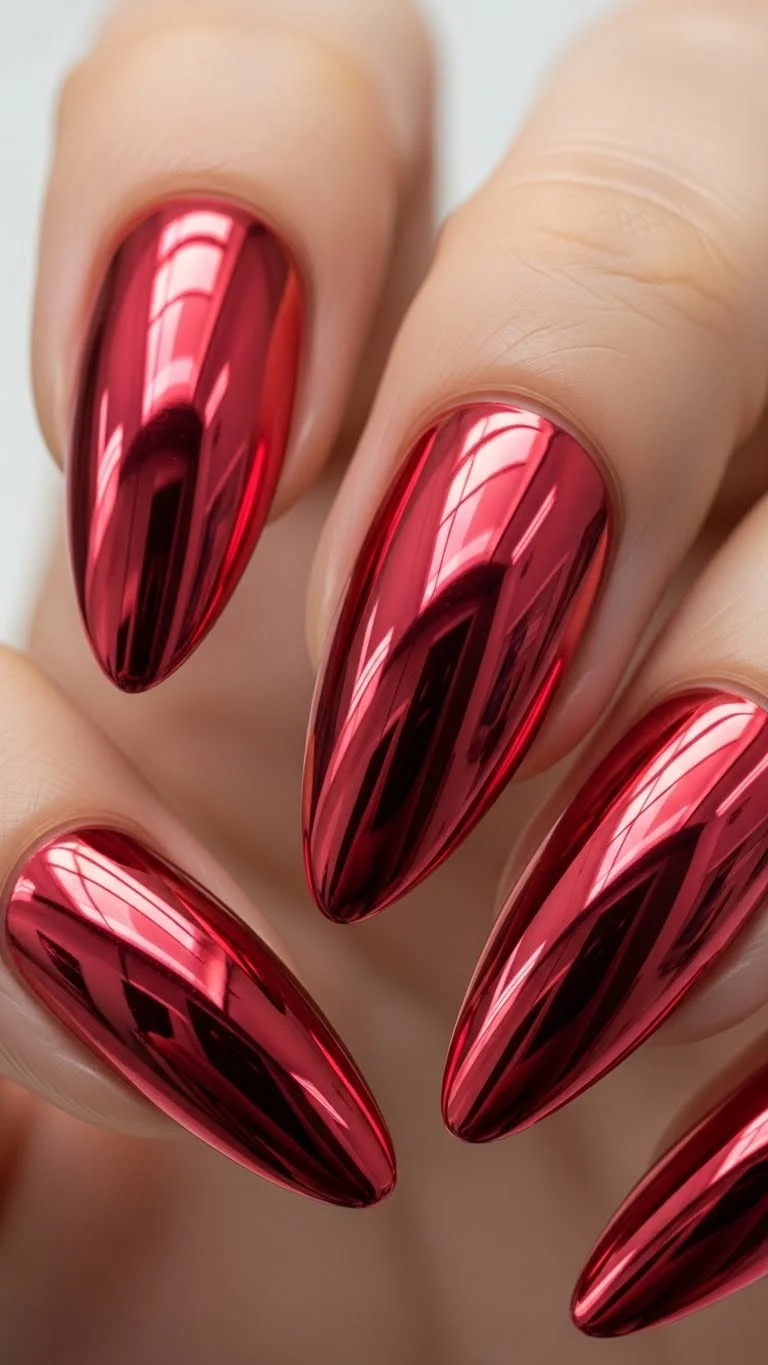
Chrome nails have a futuristic, high-fashion vibe. They catch the light every time you move your hands. While salons charge extra for “chrome powder,” you can find metallic red polishes that do the same thing. Look for bottles labeled “foil” or “chrome.” For the best result, apply a very smooth base coat first. Metallic colors show every bump on the nail surface. You can also find affordable chrome press-on nails online. These are great because they won’t chip as easily as polish. It is a low-effort way to get a very “extra” look for your Valentine’s plans.
- Negative Space Hearts
Negative space designs use your natural nail as part of the art. This looks very professional and “editorial.” To do this, cut a small heart out of a piece of tape. Stick the heart onto the center of your bare nail. Paint over the entire nail with red polish. While it is still wet, use tweezers to peel off the tape heart. You are left with a clear heart window surrounded by red. This style is great because as your nail grows out, the gap at the bottom is less noticeable. It saves you money by extending the life of your manicure. It is a smart and stylish choice.
- Ruby Red Rhinestones
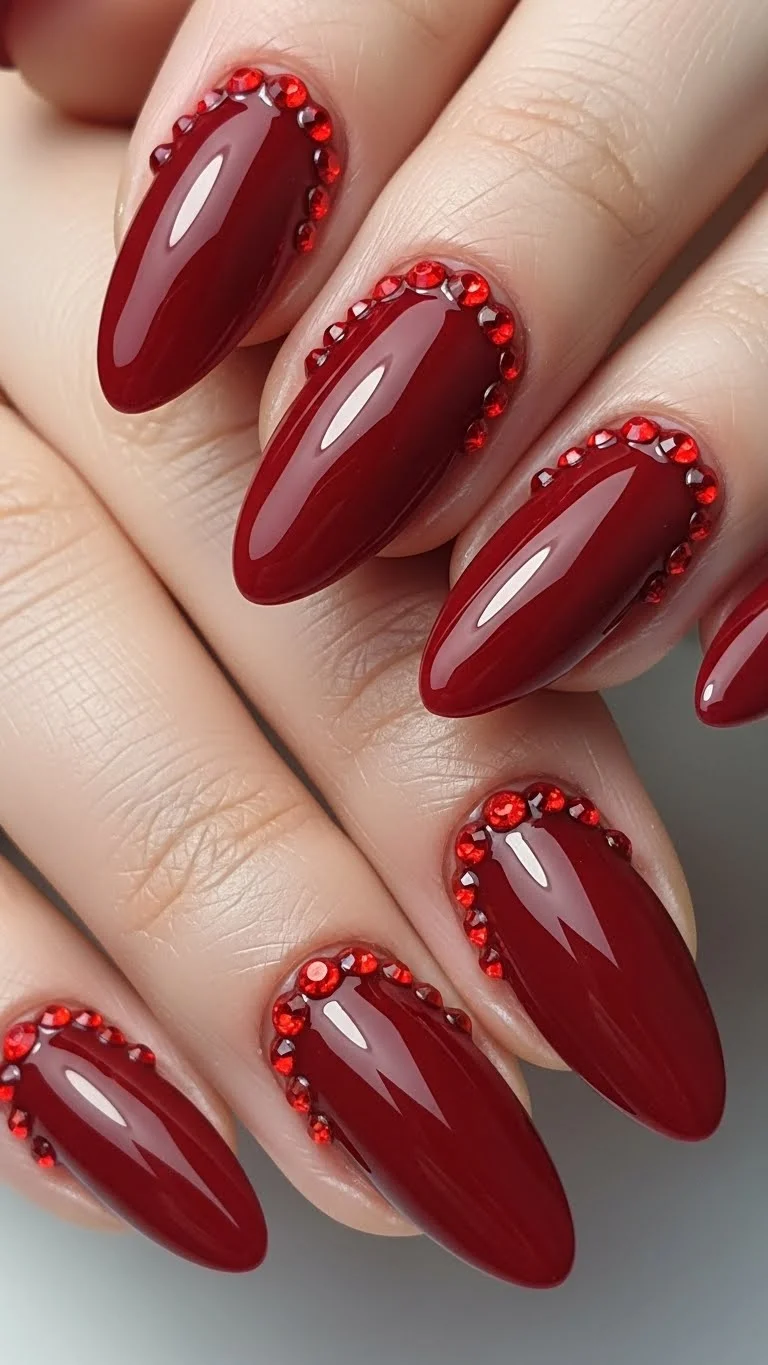
If you love jewelry, put some on your nails. Adding stones makes your hands look expensive. You don’t need to go to a pro for this. Buy a pack of flat-back rhinestones from a craft store. Apply your red polish and let it dry. Put a tiny dot of top coat or nail glue where you want the stone. Use a dampened toothpick to pick up the gem and press it into place. Placing them near the cuticle line looks very chic. It adds a 3D element that feels special for a holiday. One pack of stones will last you for years of Valentine’s Days.
- Red Marble Swirl
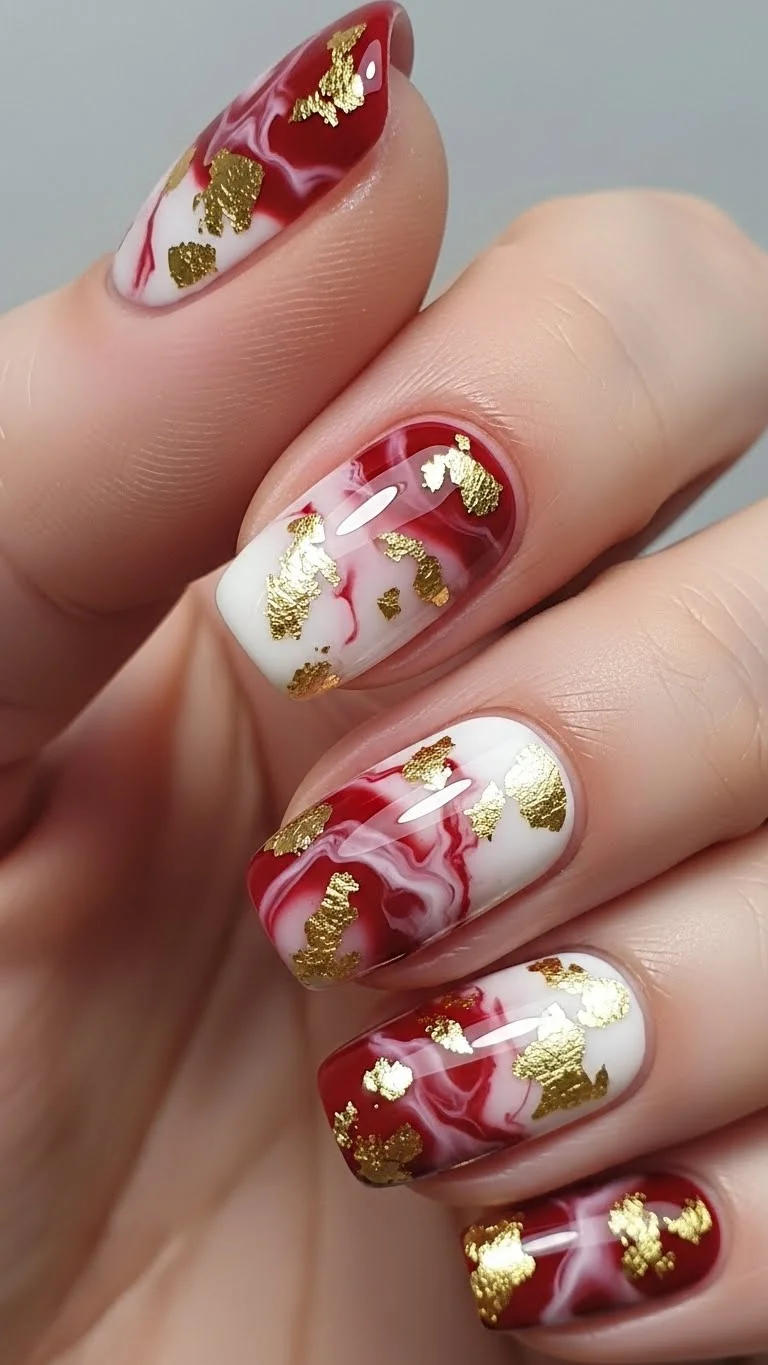
Marble nails look like expensive stone. The swirls are unique on every finger, so you don’t have to worry about being perfect. This is a “happy accident” style of art. Drop a few dots of red and white polish onto a piece of plastic wrap. Use a toothpick to swirl the colors together slightly. Press your nail onto the polish and lift. Clean up the edges with a brush dipped in remover. You get a custom, high-end look for no extra cost. This works best with a bright red and a crisp white. Adding a few dots of gold can make it look even more luxurious and unique.
- Elegant Burgundy Wine

Not everyone wants a bright “fire engine” red. A dark burgundy or wine color is a more understated way to show love. It is a classic choice that works for the office and a date. Darker colors look best on shorter nails with a rounded edge. It keeps the look clean and not too aggressive. When using dark colors, always use a base coat to prevent staining your natural nails. This shade is very forgiving and easy to apply. It is a sophisticated alternative for someone who wants a “quiet luxury” Valentine’s vibe.
- Red Leopard Print
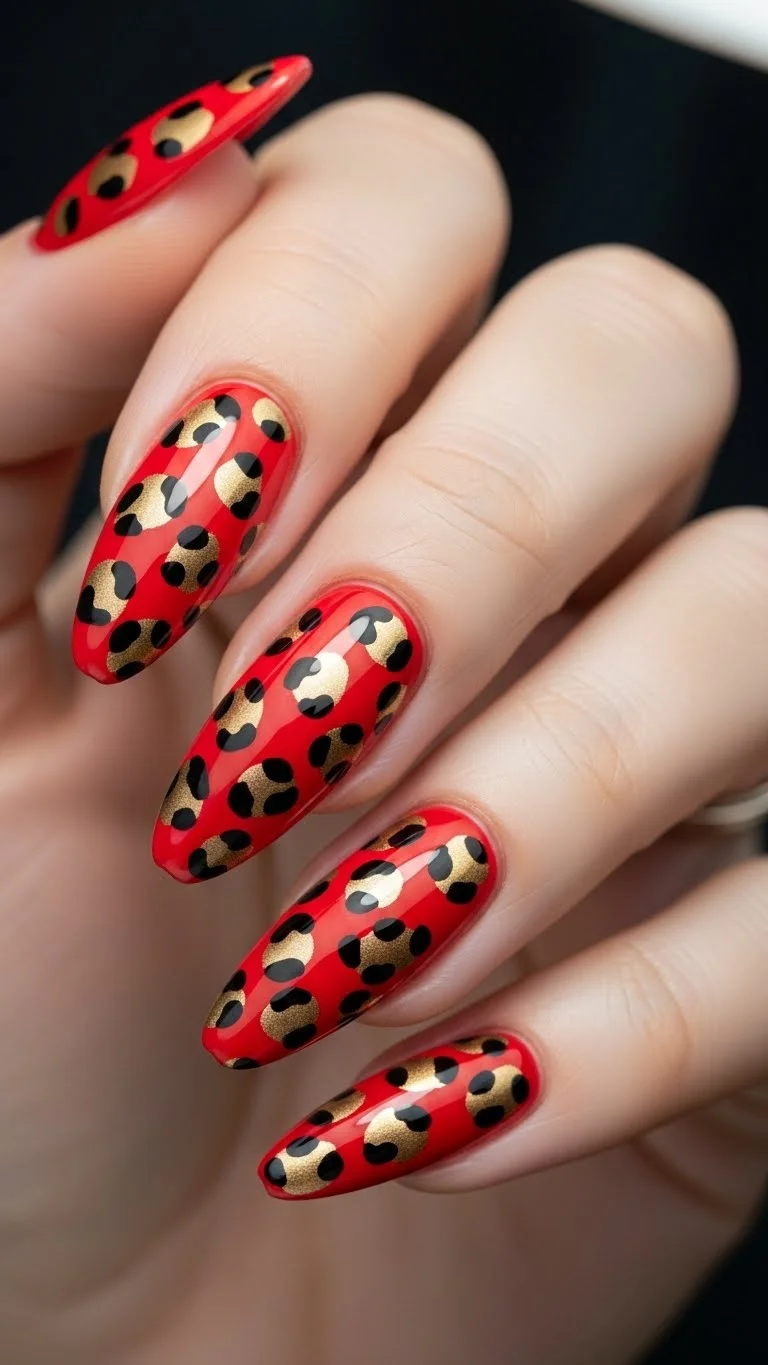
For those who want to show their “wild side,” leopard print on a red base is perfect. It is fierce and full of confidence. You can do this with a thin brush or a toothpick. Paint your nails red. Add random “C” shapes in black polish. Put a dot of gold or a darker red in the center of the black shapes. The beauty of leopard print is that it shouldn’t be perfect. Messy spots actually look more realistic. It is a fun DIY project that doesn’t require a steady hand. Use your oldest black polish for this; a thicker consistency actually helps the spots stay in place.
- Polka Dot Passion
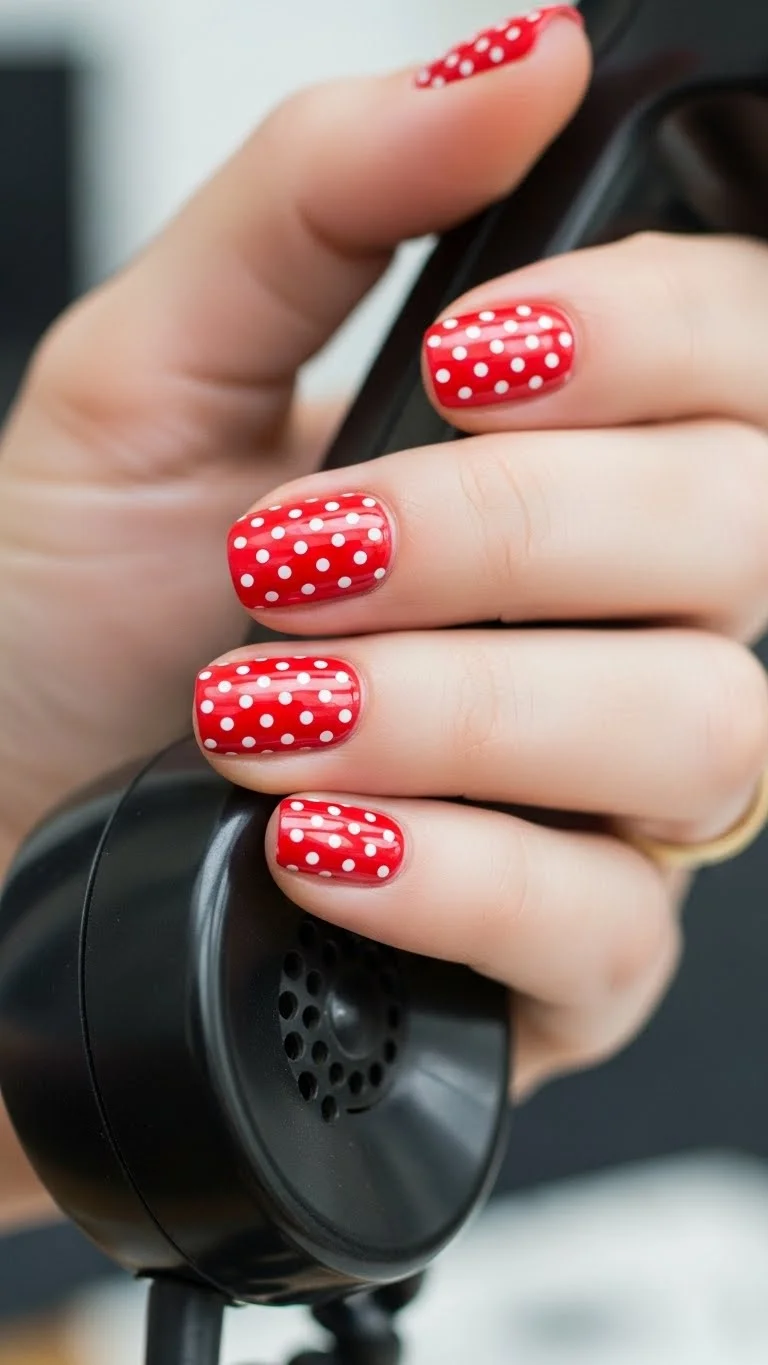
Polka dots are playful and have a vintage, 1950s feel. This look is cute and approachable. It is also one of the easiest designs to do yourself. Use the end of a bobby pin as a dotting tool. Dip it in white or pink polish and press it onto your red nails. Space them out evenly for a clean look, or bunch them up for a “confetti” feel. This design is great for beginners because it is hard to mess up. It adds a youthful energy to your Valentine’s Day outfit. Best of all, it works on any nail length or shape.
- Shimmering Red Velvet
![]()
Magnetic polish creates a “velvet” look that seems to move when you turn your hand. It is a huge trend right now. You can buy magnetic red polish sets for a low price online. They come with a small magnet. You paint the nail and hold the magnet over it while the polish is wet. The metal particles in the paint react to the magnet, creating a shimmering line. It looks like a complex professional service. If you don’t want to buy the magnet, just use a red polish with a “shimmer” or “pearl” finish. It gives a similar soft, glowing effect that is very romantic.
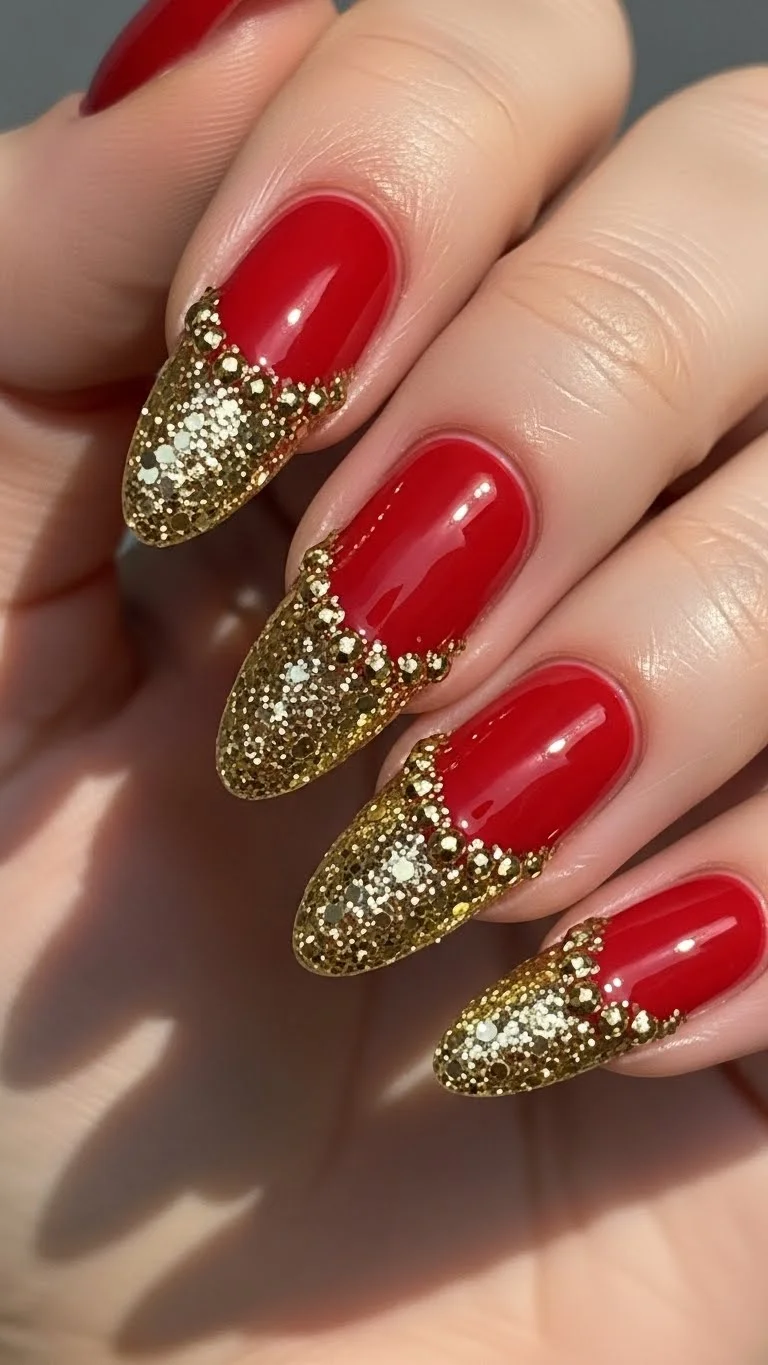
- Red Tips with Gold Foil
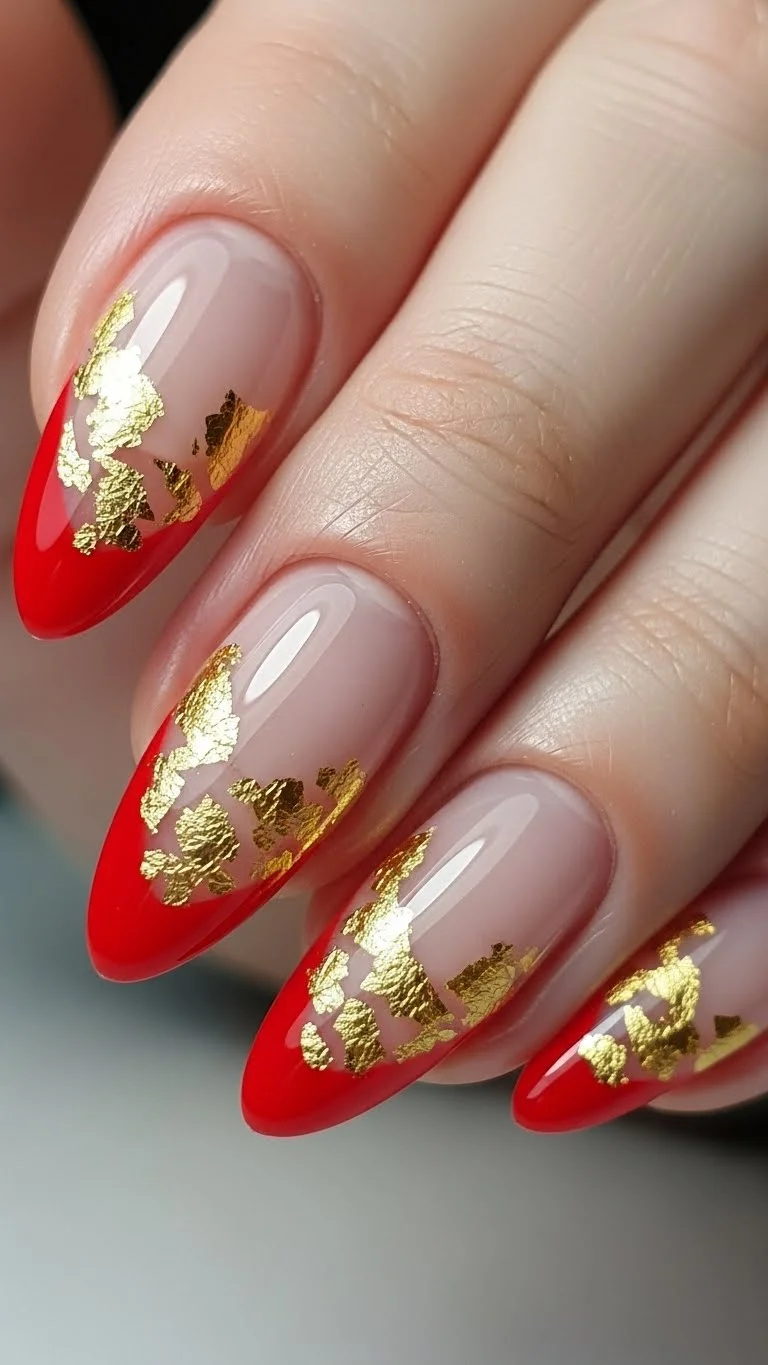
Gold and red are a royal combination. Adding a bit of gold foil makes your nails look like a piece of art. You can buy gold nail flakes very cheaply. Paint your tips red. While the paint is still “tacky” (not fully dry), use tweezers to press tiny bits of gold foil onto the nail. You can put them along the edge of the red or all over. Seal it with a clear top coat so the foil doesn’t peel off. This covers up any shaky lines you might have made with the red polish. It is a creative way to hide mistakes while looking fancy.
- The “Love Letter” Nail
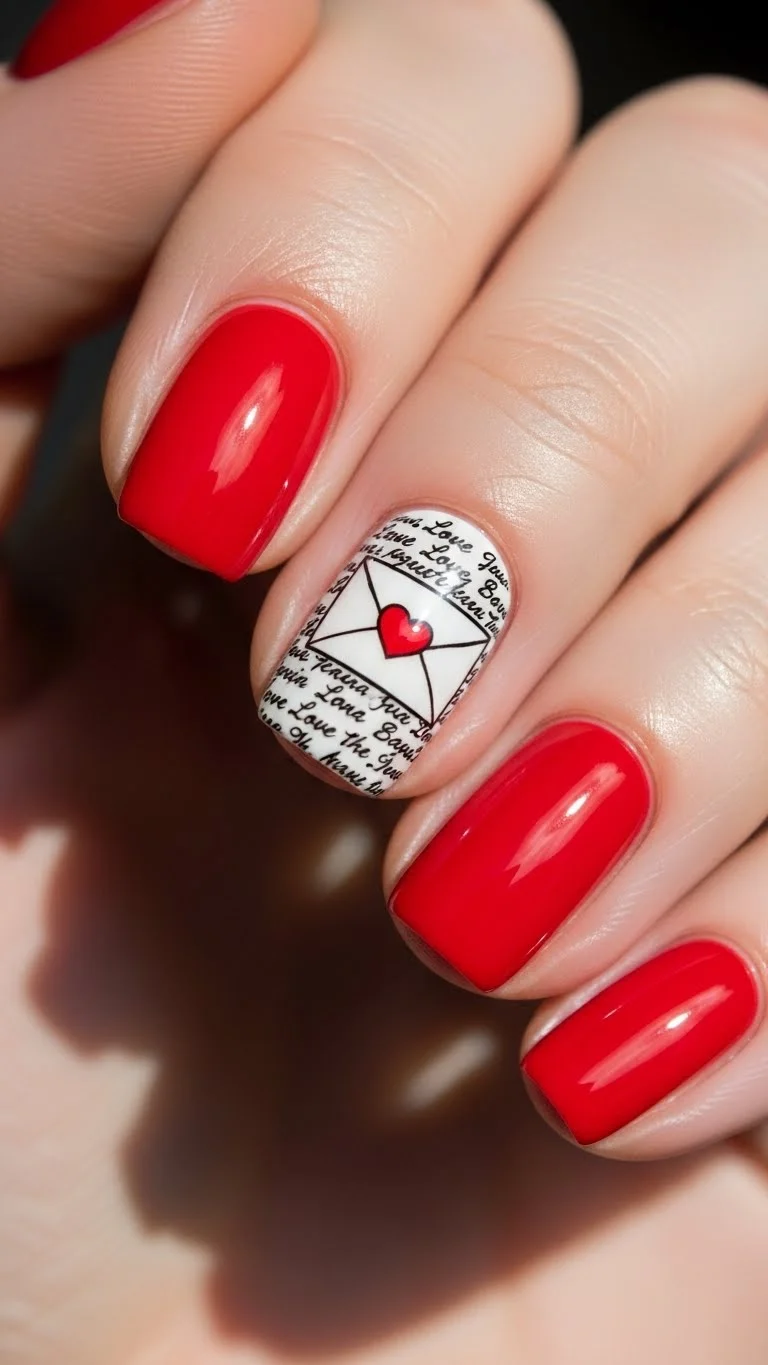
This is a very literal and sweet Valentine’s design. Use white polish on one nail and red on the others. On the white nail, use a very fine pen or a nail art brush to draw thin horizontal lines. It looks like a tiny piece of notebook paper or a love letter. Add a small red heart in the corner like a “stamp.” If your handwriting isn’t great, you can find nail decals or stickers that look like writing. This is a conversation starter and looks very thoughtful. It is a great way to express your personality through your manicure.
- Matte and Glossy Contrast
Using different textures of the same color is a “pro” secret. It looks very expensive but is actually free if you have both top coats. Paint your nails red and use a matte top coat on the whole nail. Once dry, take a glossy top coat and paint just the very tip. This creates a “tone-on-tone” French manicure. The difference in light reflection is subtle but very cool. It is a sophisticated way to use what you already have. This works best on longer nails where the contrast is more visible. It is a very “fashion-forward” choice.
- Red Ombre Fade
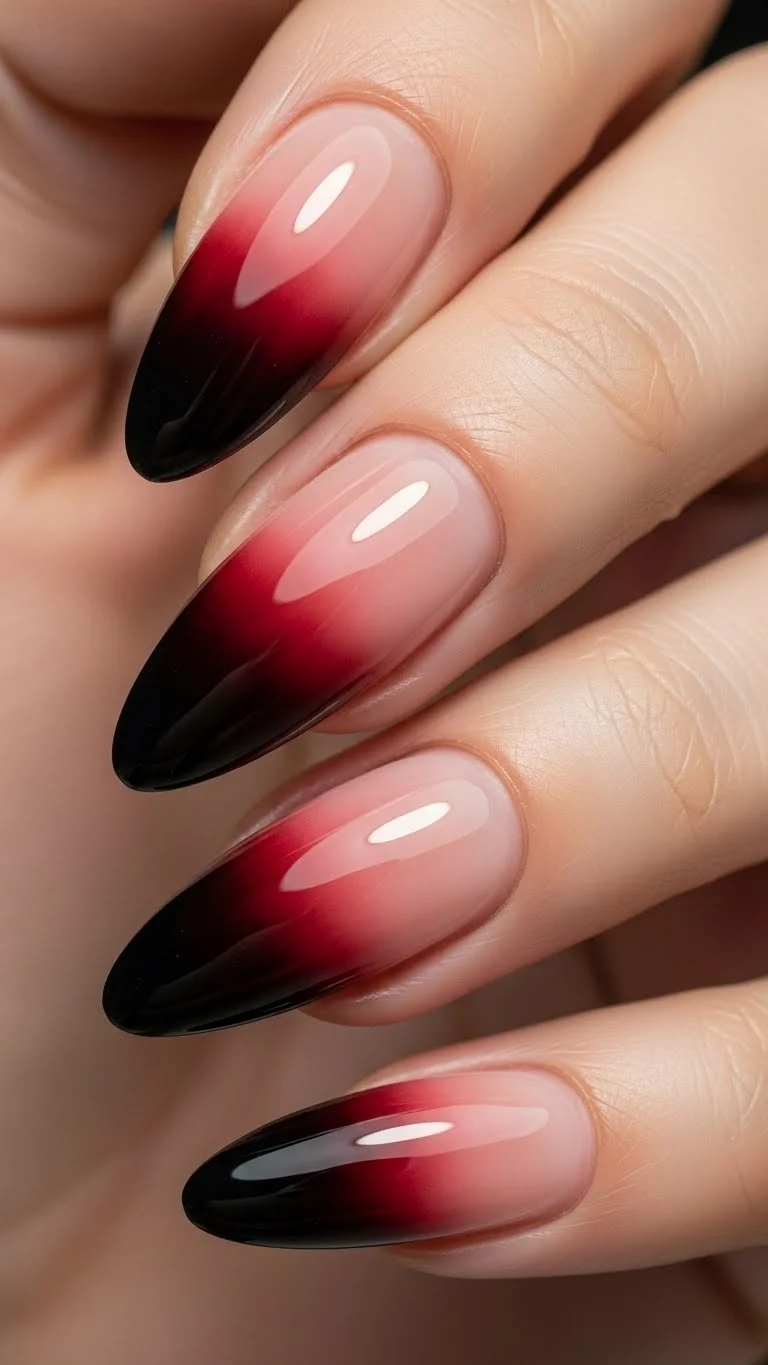
Ombre nails create a beautiful gradient that looks like a sunset. For Valentine’s, try fading from a bright red to a deep burgundy. You can do this with a makeup sponge. Paint the two colors in stripes on the sponge. Press the sponge onto your nail repeatedly until the colors blend. It can be messy, so put some tape or petroleum jelly around your skin first to make cleanup easier. This hides the fact that your nails might be different lengths. It is a bold, artistic look that feels very custom and high-effort.
- Red Nails with a Sparkly Border
Framing your nails with glitter is like putting a picture in a frame. It defines the shape and adds a “halo” of sparkle. Use a very thin nail art brush and some silver or gold glitter. Trace the very edge of your nail, near the cuticle and the sides. This works best if you have a steady hand, but you can always use a toothpick to fix errors. It is a very regal look that makes even a simple red manicure look like it cost a hundred dollars. It is perfect for someone who wants just a “hint” of glitter without going overboard.
- Abstract Red Swooshes
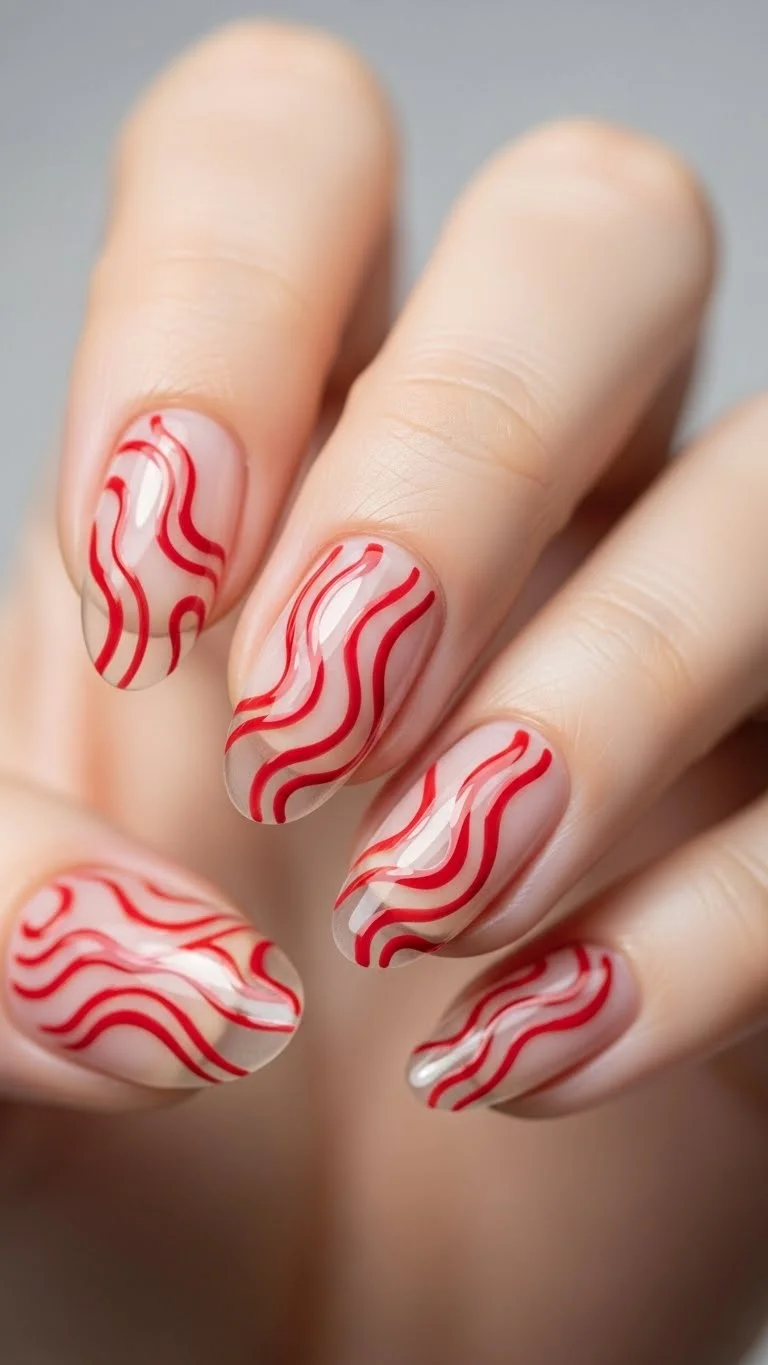
If you aren’t good at straight lines, abstract art is for you. Wavy “swooshes” are very popular right now. Use a thin brush to draw organic red lines over a clear or nude base. There is no wrong way to do this. Some lines can be thick and others thin. This “negative space” look is very trendy and doesn’t show growth. It is a low-maintenance way to wear red. You only need one color and a clear coat. It looks like you spent hours at a boutique salon, but it only takes ten minutes at your kitchen table.
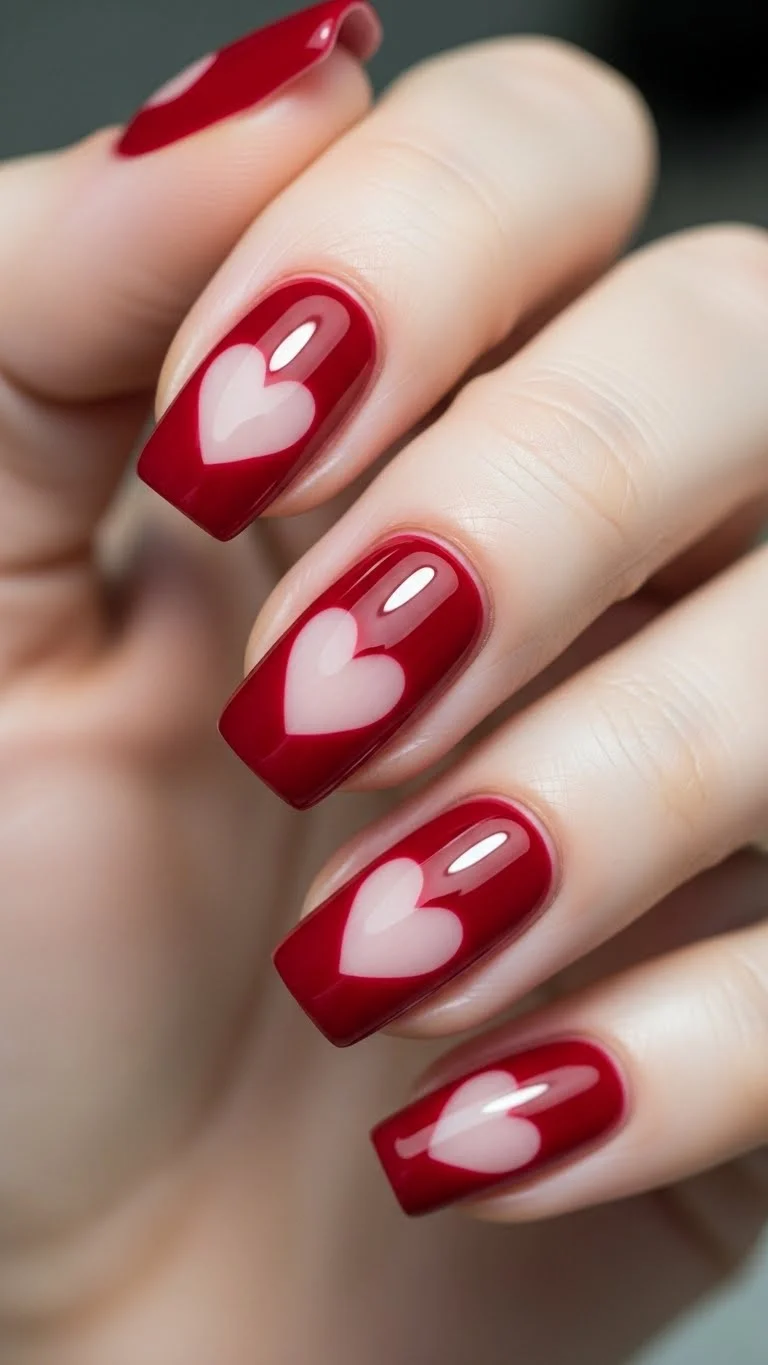
- Red Hearts on Nude Nails
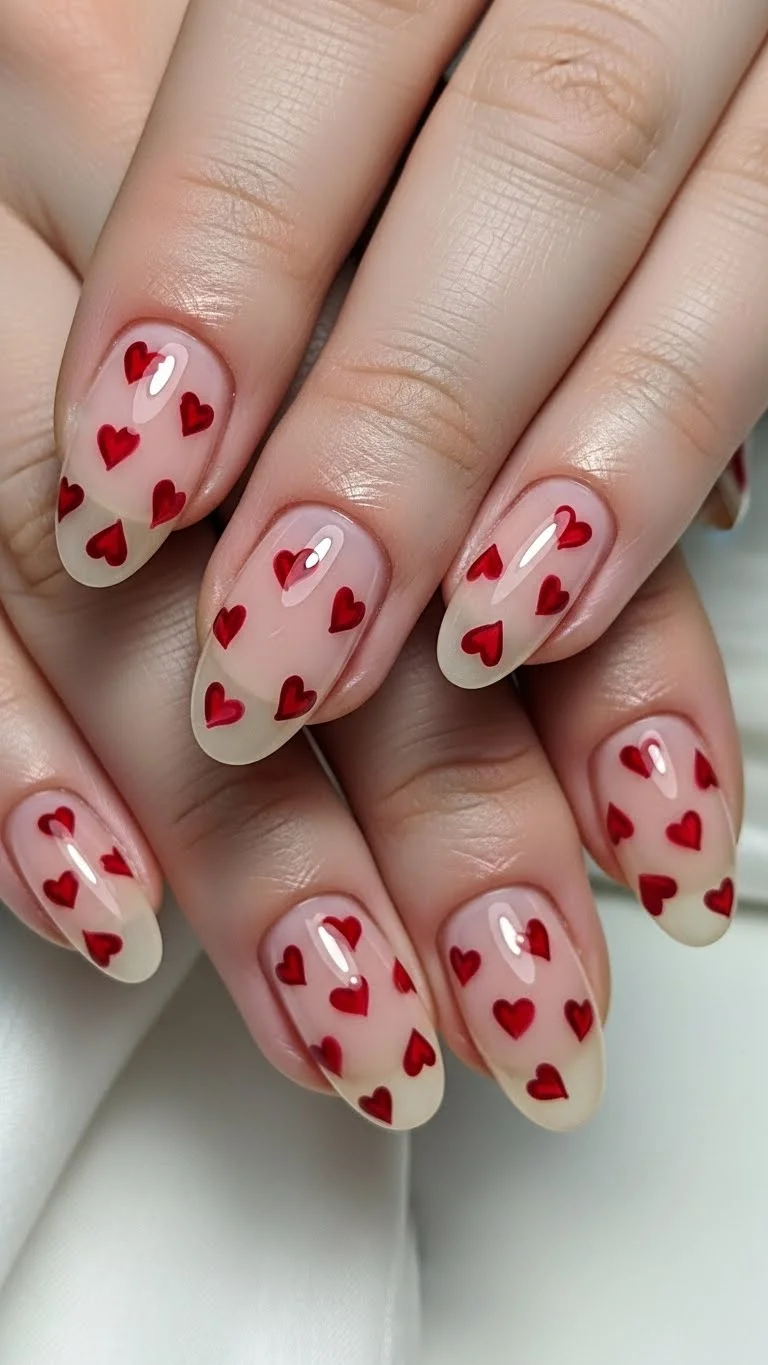
This is the ultimate “clean girl” Valentine’s look. It is dainty and very feminine. Start with a sheer nude or pink base that matches your skin tone. Use your toothpick tool to add tiny red hearts all over the nail. You can put one or ten—it’s up to you. This looks great on very short, natural nails. It is a budget-friendly way to feel festive without committing to a full red nail. Plus, if one heart chips, it is very easy to fix without repainting the whole hand.
- Glitter “Cuffs”
A “cuff” is the opposite of a French tip. You put the detail at the base of the nail. This is a great way to hide a manicure that is starting to grow out. If you have a gap between your red polish and your cuticle, fill it in with a thick glitter polish. It looks intentional and stylish. It saves you from having to do a full “fill-in” or a new manicure. This practical hack keeps your nails looking “fresh” for an extra week. Use a chunky glitter for the best “jewelry” effect.
- Red Base with Black Lace
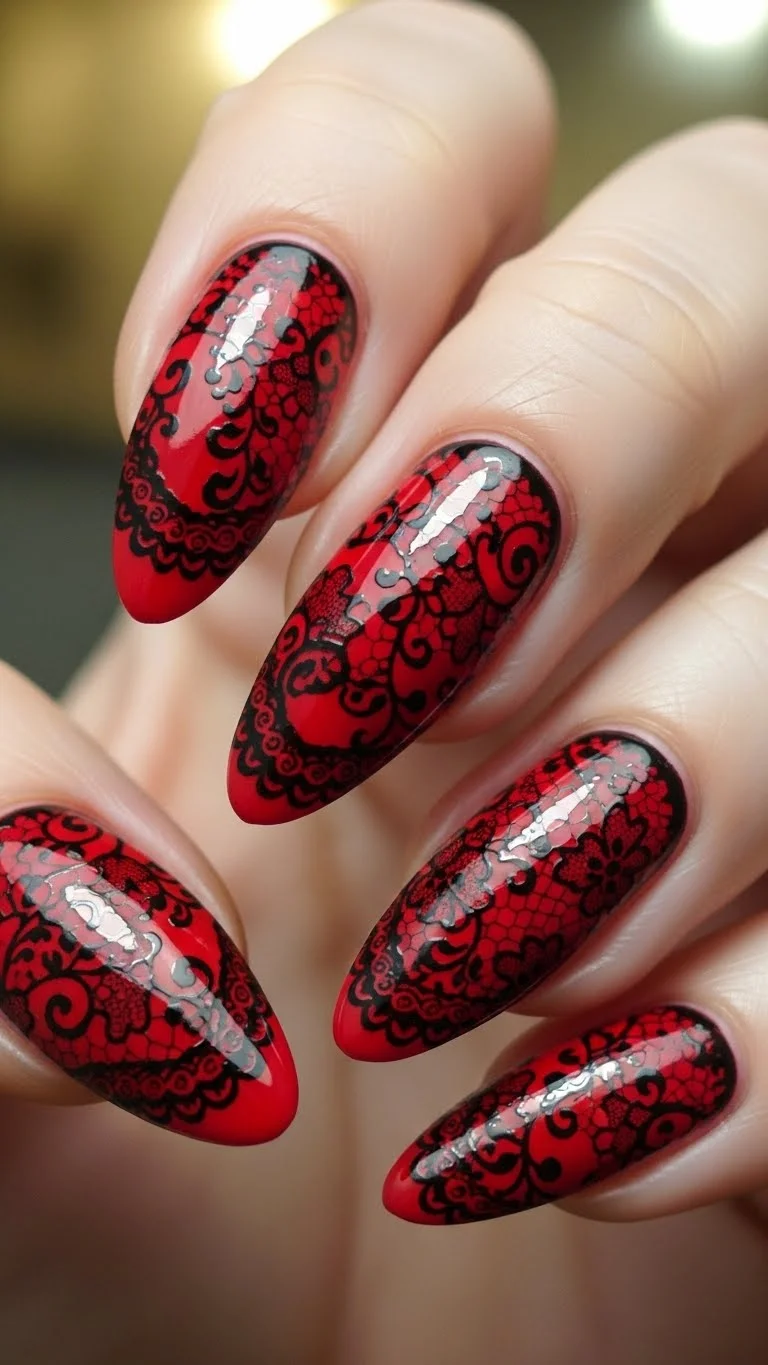
Lace is a classic romantic texture. You can get this look using nail stamping kits. These are affordable tools where you scrape polish over a metal plate and “stamp” the design onto your nail. If you don’t have a kit, you can actually use a small piece of real lace fabric. Hold it over your red nail and sponge black polish over it. When you lift the lace, the pattern stays behind. It is a very “DIY” way to get an intricate look. It adds a touch of “gothic romance” to your Valentine’s Day style.
- High-Gloss Jelly Red
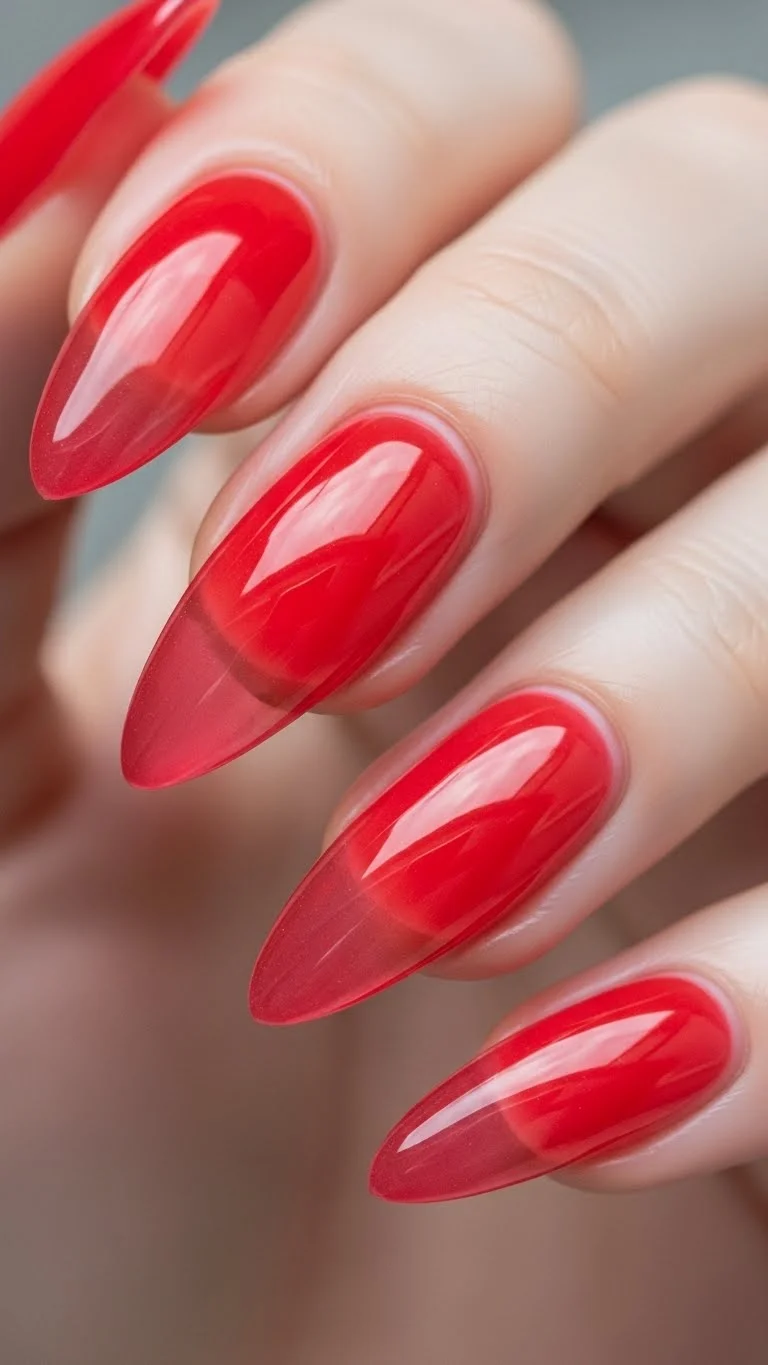
Jelly nails look like Jolly Ranchers. They are semi-transparent and very shiny. This is a huge trend that looks great in red. You can make your own “jelly” polish easily. Mix a few drops of red polish into a bottle of clear top coat. This thins out the color, making it see-through. Apply three layers for a “squishy” look. It is a fun and youthful way to wear red. Because it is sheer, chips are much harder to see. It is a great “low-stress” manicure for a busy week of celebrations.
Conclusion
Red nails are more than just a holiday tradition; they are a way to express your inner strength and romantic side. By using these simple tips—like using toothpicks for art or mixing your own “jelly” shades—you can achieve a high-end look on a tiny budget. You don’t need a professional to have nails that make you feel beautiful. Pick the style that matches your personality and give it a try this week.