26 Gorgeous Valentines Nails Ideas You’ll Want to Screenshot

Finding the perfect manicure for February 14th feels like a small win for your self-care routine. Whether you have a hot date or you are celebrating “Galentine’s” with your best friends, your hands should match the mood. You don’t have to spend a fortune at a luxury salon to get these looks. Most of these styles work well on natural nails or affordable press-ons. From classic crimson to modern minimalist accents, these ideas offer something for every skill level and budget.
- Classic Red Chrome
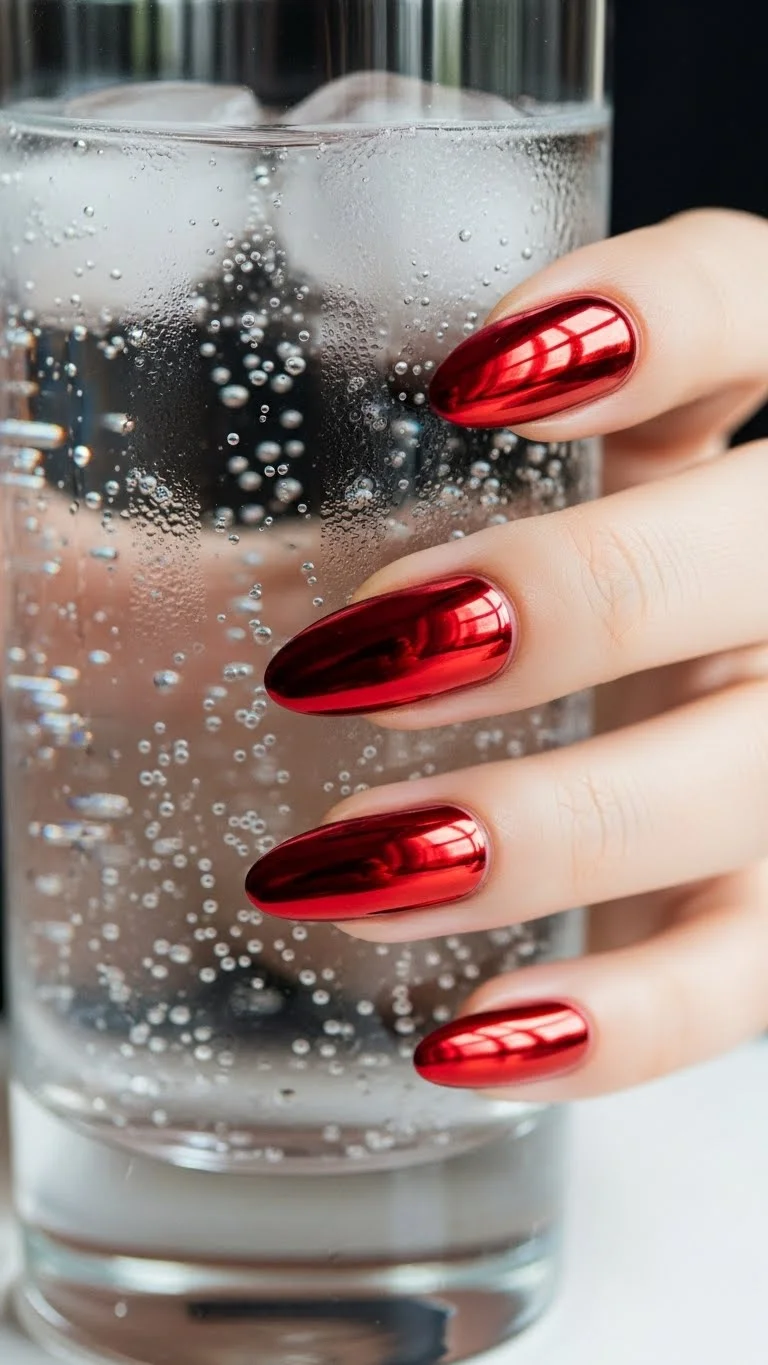
Red chrome is the ultimate showstopper for Valentine’s Day. It takes the traditional holiday color and gives it a futuristic, high-shine finish. You can achieve this at home without professional equipment. Buy a red gel polish and a cheap bottle of chrome pigment powder online. Apply your base color and then rub the powder on with a sponge applicator. Seal it with a glossy top coat. This look stays shiny for weeks and hides small imperfections well. If you are on a tight budget, look for “metal effect” nail lacquers at the drugstore. They provide a similar sheen for under five dollars. It looks expensive but costs almost nothing.
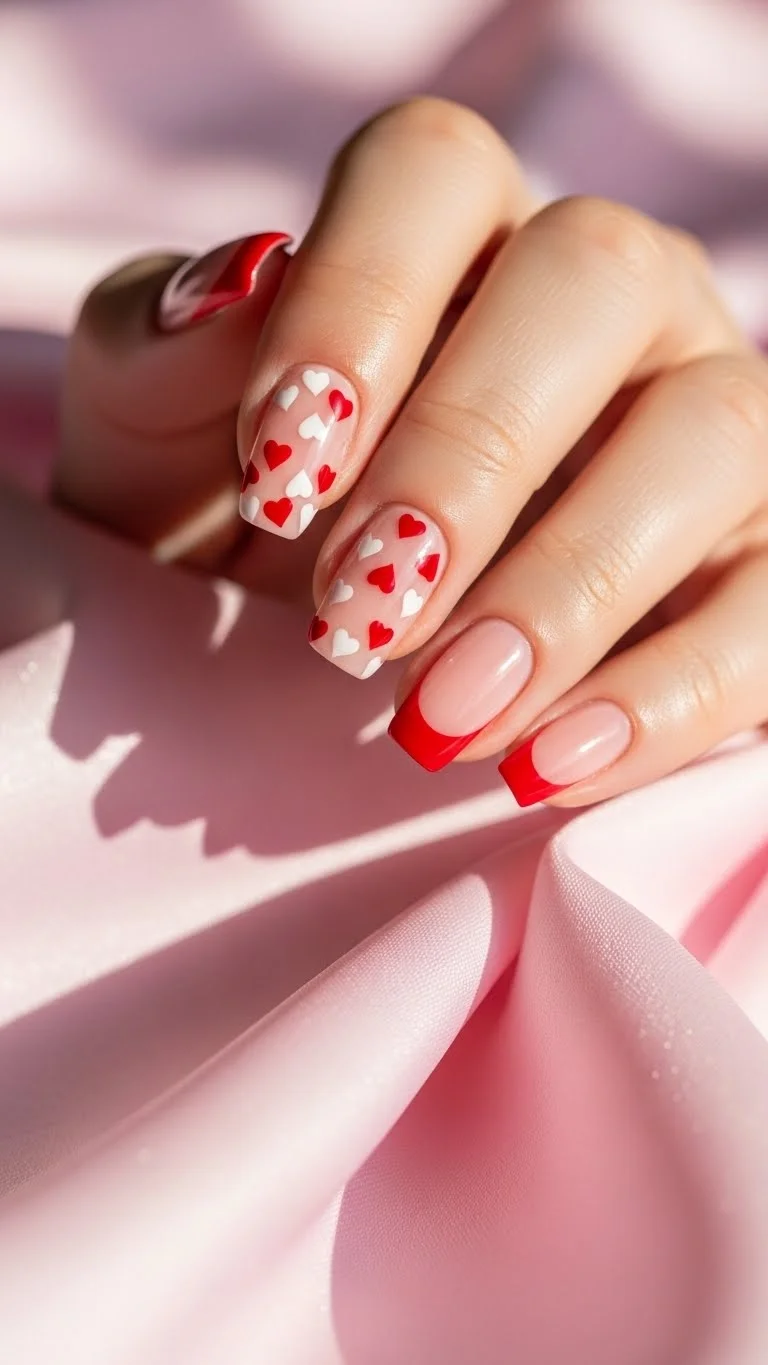
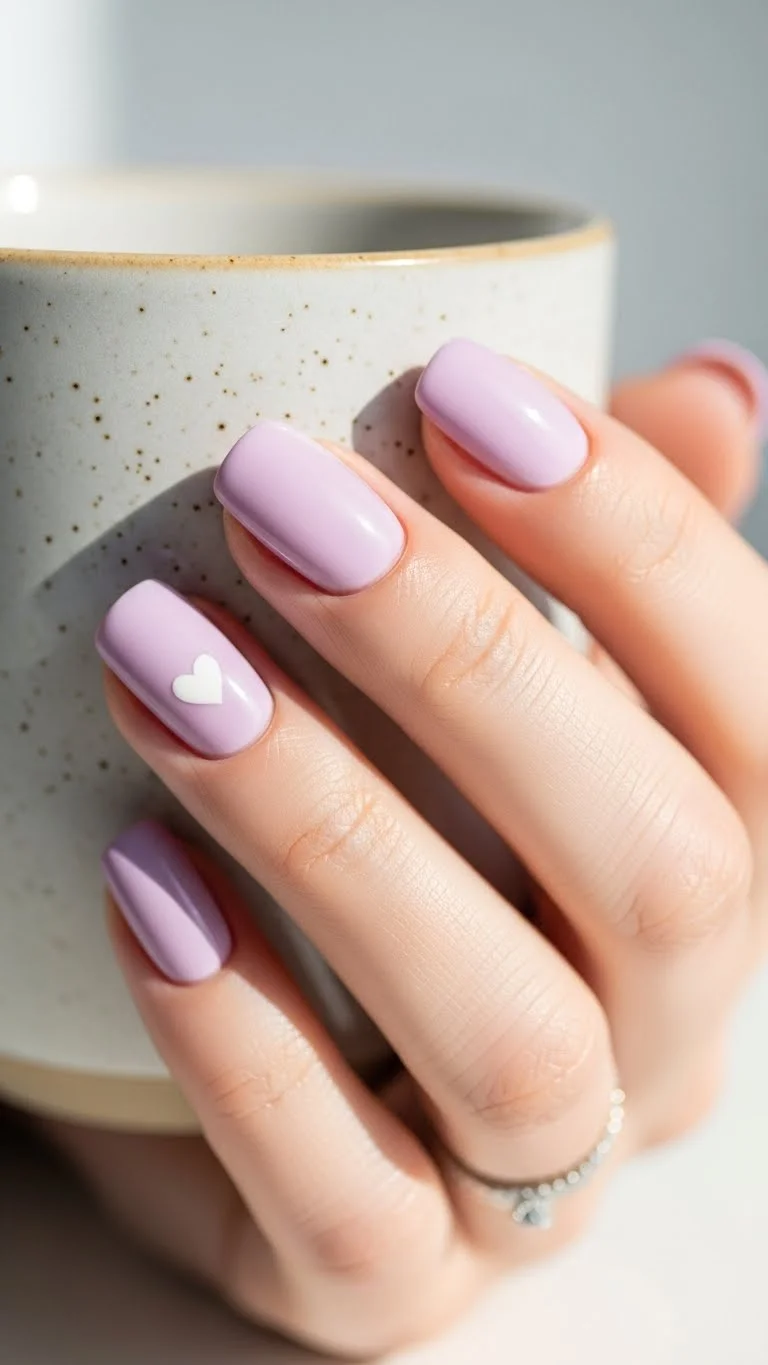
- Tiny Heart Accents
Minimalism is a big trend this year. Instead of painting every nail solid red, try a nude base with one tiny heart. Use a toothpick or a bobby pin to dot the paint. Dip the tip into red polish and make two small dots side by side. Drag them down into a point to form the heart shape. This technique is perfect for beginners who worry about shaky hands. It works on very short nails too. You only need a bottle of clear coat and one accent color. It is subtle enough for the office but festive enough for dinner.
- Pink and Red French Tips
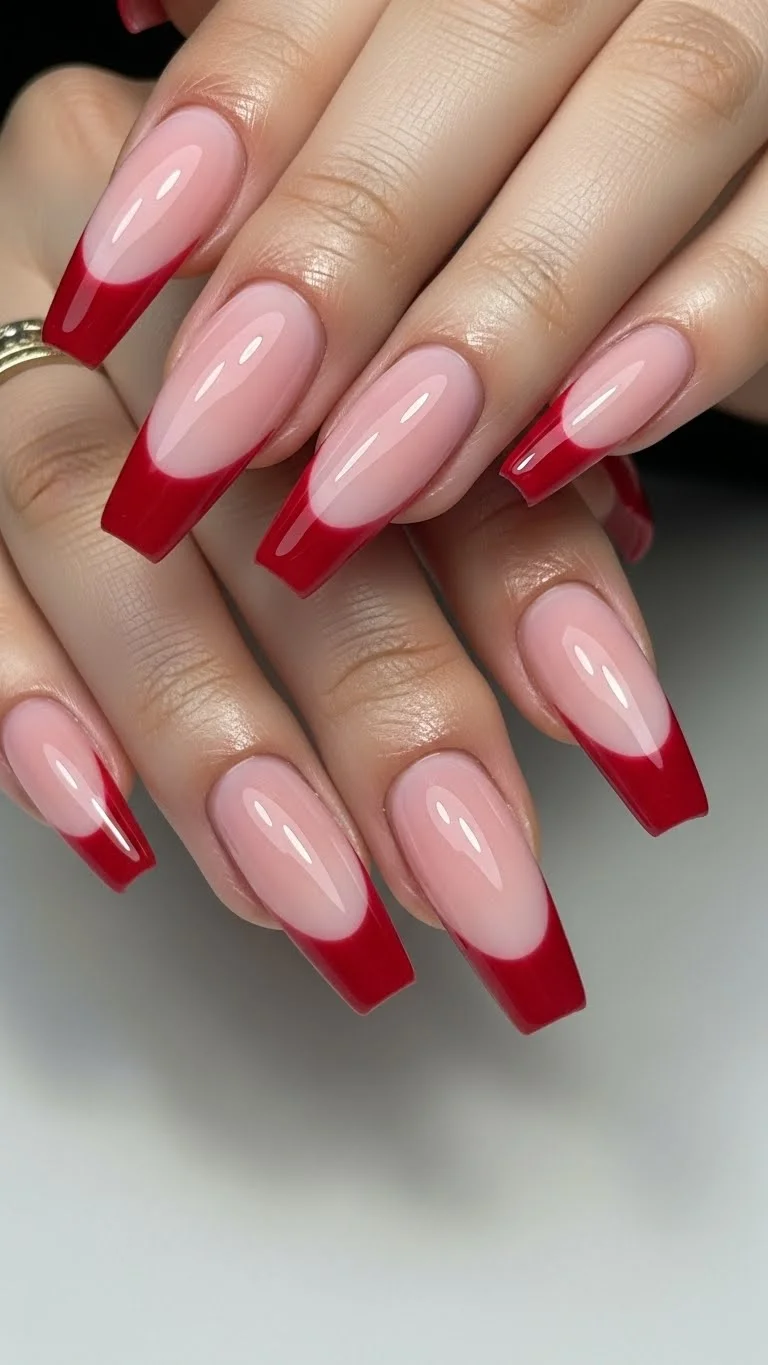
Why choose one color when you can use both? Pink and red used to be a fashion “no-no,” but now they are the perfect pair. Paint your nails a soft petal pink first. Let them dry completely. Use French tip guides or even circular stationery stickers to mask off the ends. Paint the tips a bright red. This creates a high-contrast look that pops in photos. For a DIY version, use a makeup sponge to dab the red on the tips for a softer, blurred effect. It’s a fun twist on a timeless style.
- Matte Burgundy Elegance
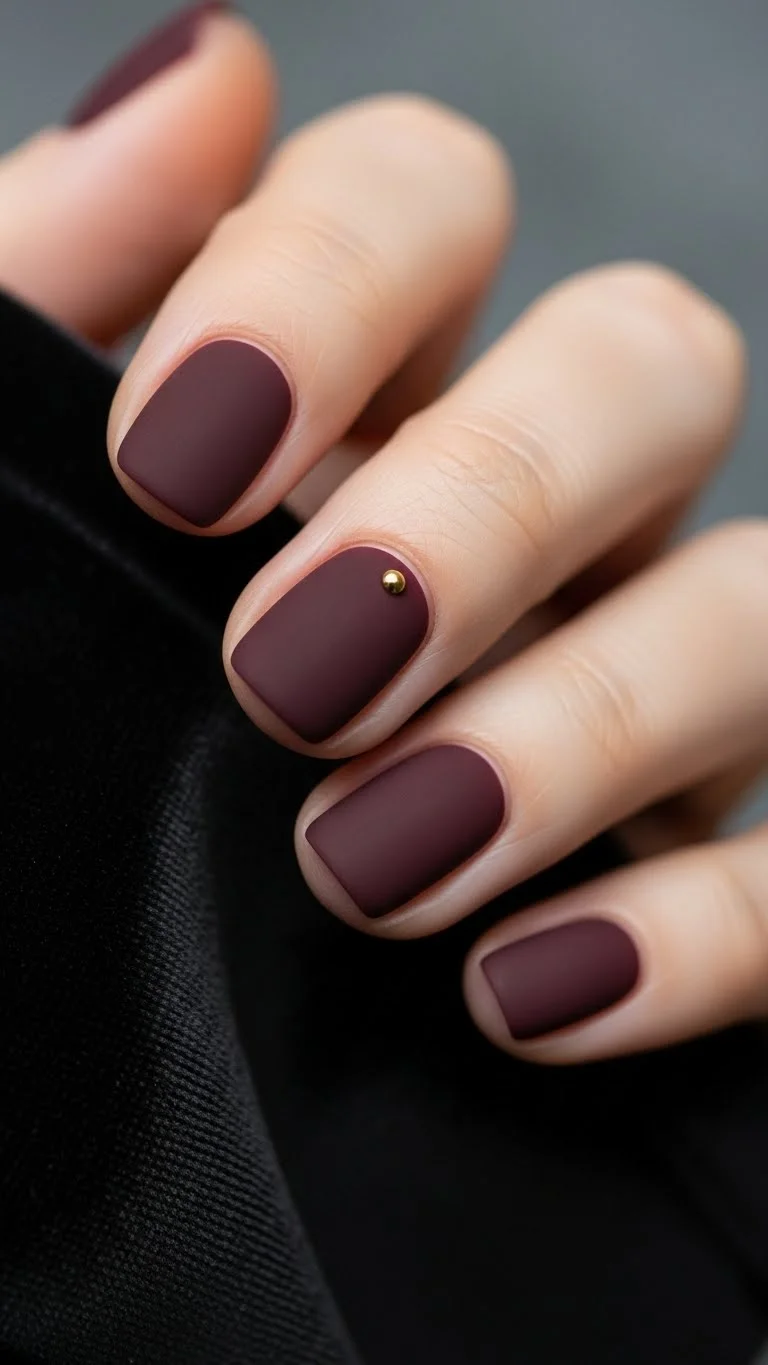
Matte finishes feel cozy and sophisticated. Burgundy is a great alternative if bright red feels too loud. You can turn any polish you already own into this look with a matte top coat. Apply your dark red polish as usual. Once dry, add the matte layer to remove the shine. It looks like velvet on your fingertips. To keep it budget-friendly, skip the salon and buy a matte topper from a discount brand. It instantly changes your entire nail collection. This style is very forgiving on uneven nail surfaces.
- White Lace Patterns
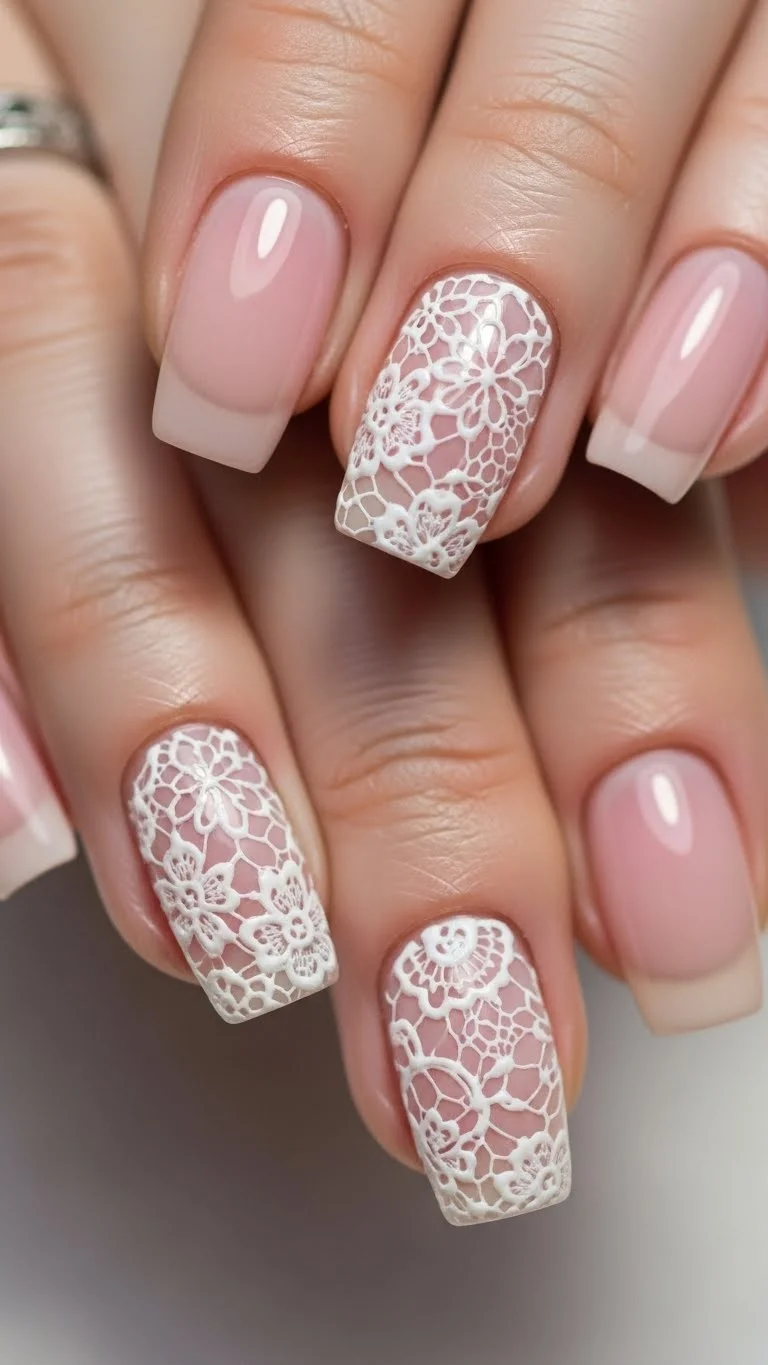
Lace patterns add a romantic, vintage vibe to your Valentine’s look. You don’t need to be a painter to do this. Look for nail stamping kits or water decals. Decals are like temporary tattoos for your nails. You soak them in water, slide them onto the nail, and pat dry. They cost a few dollars for a pack of fifty. A white lace design over a sheer “your nails but better” base looks professional. It is a great way to get complex detail without the high price of hand-painted art. Always finish with a thick top coat to prevent peeling.
- Glitter Gradient Ombre
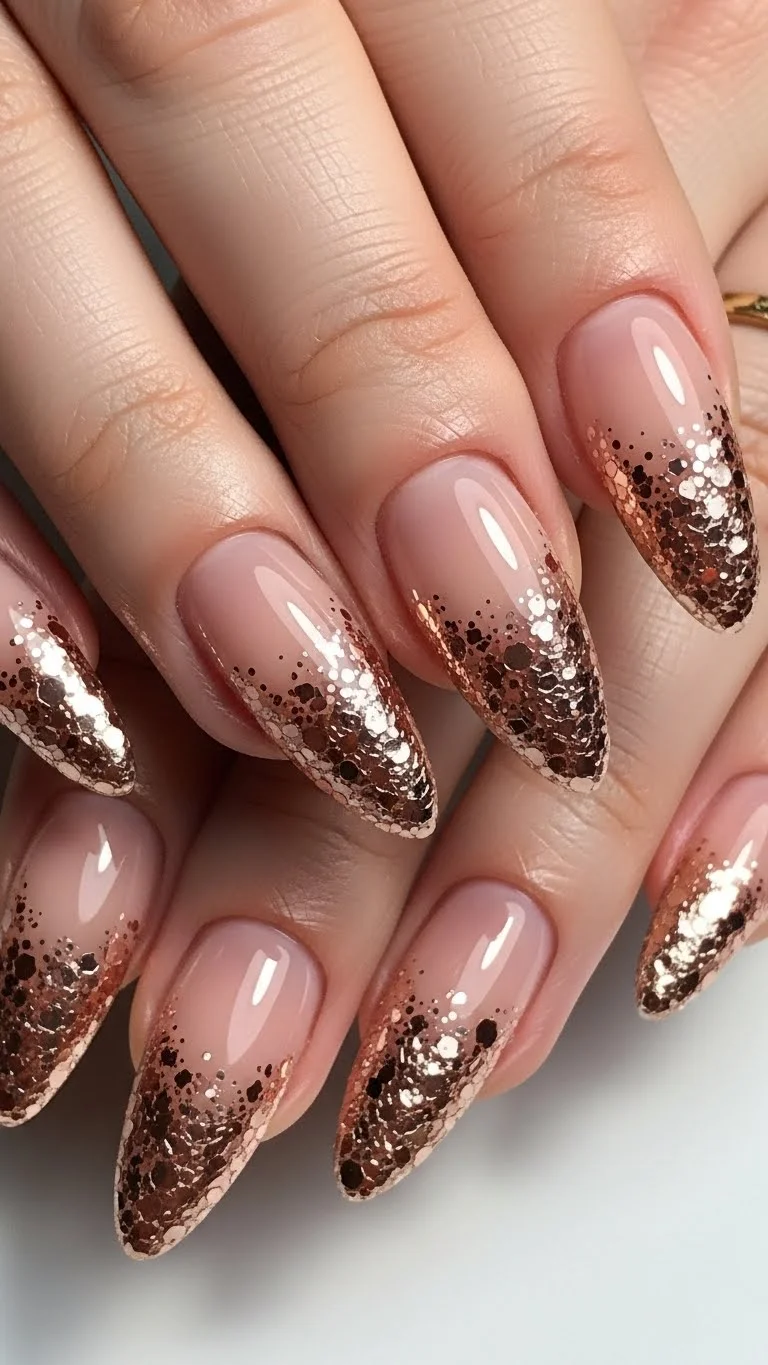
Glitter is a holiday staple. An ombre effect keeps it from looking too cluttered. Start with a clean, buffed nail. Apply a clear or light pink base. Take a glitter polish and paint only the top half of the nail. While it is wet, use a small sponge to pull the glitter down toward the middle. This creates a beautiful fade. Rose gold or soft pink glitters are perfect for a romantic theme. If your polish is thin, add a second layer only to the very tips. This hides any chips that might happen throughout the week.
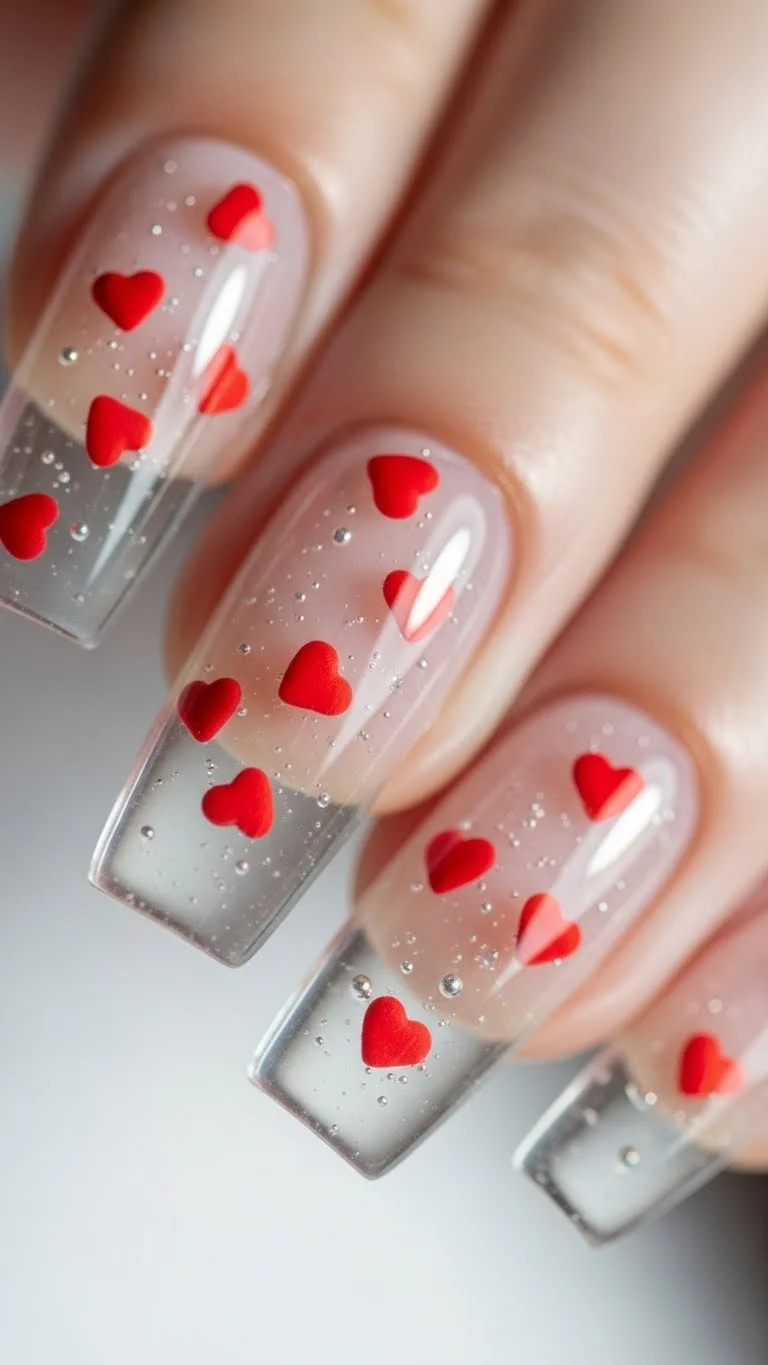
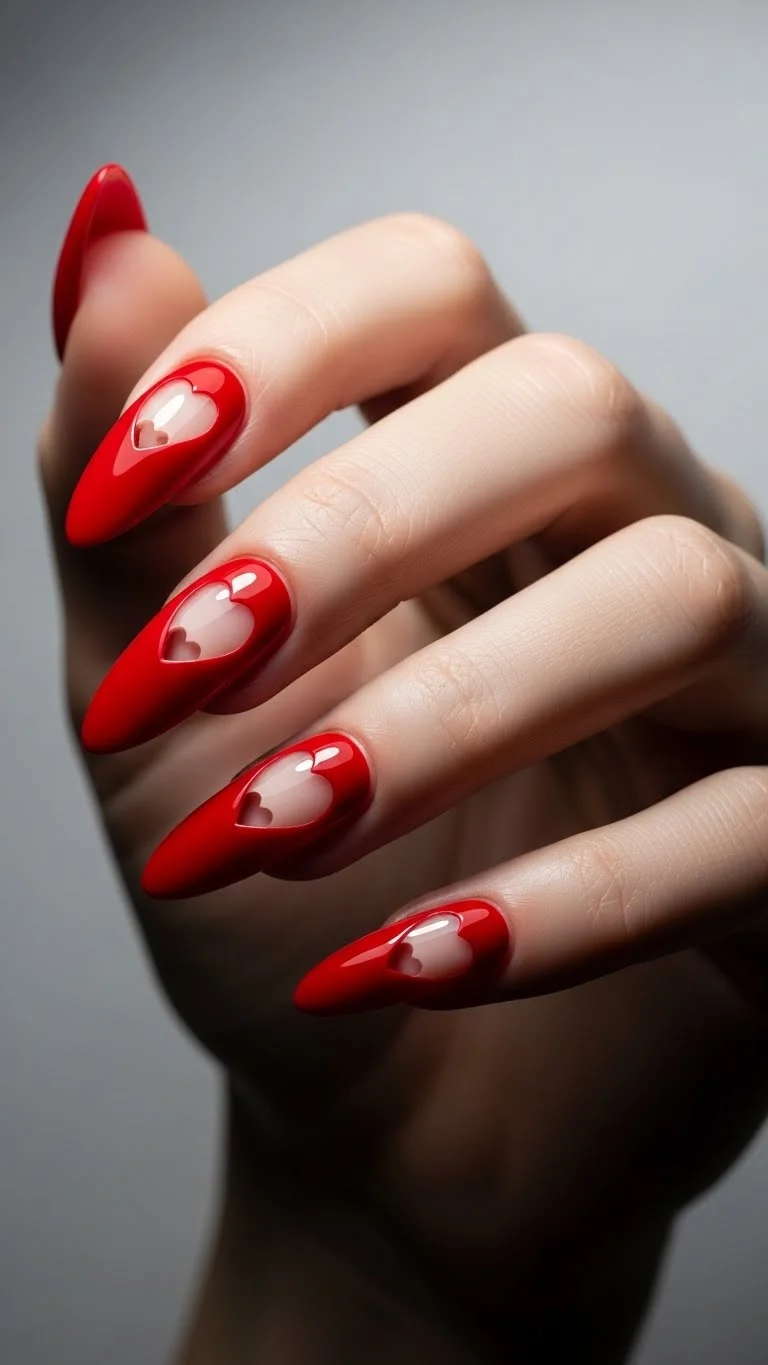
- Negative Space Hearts
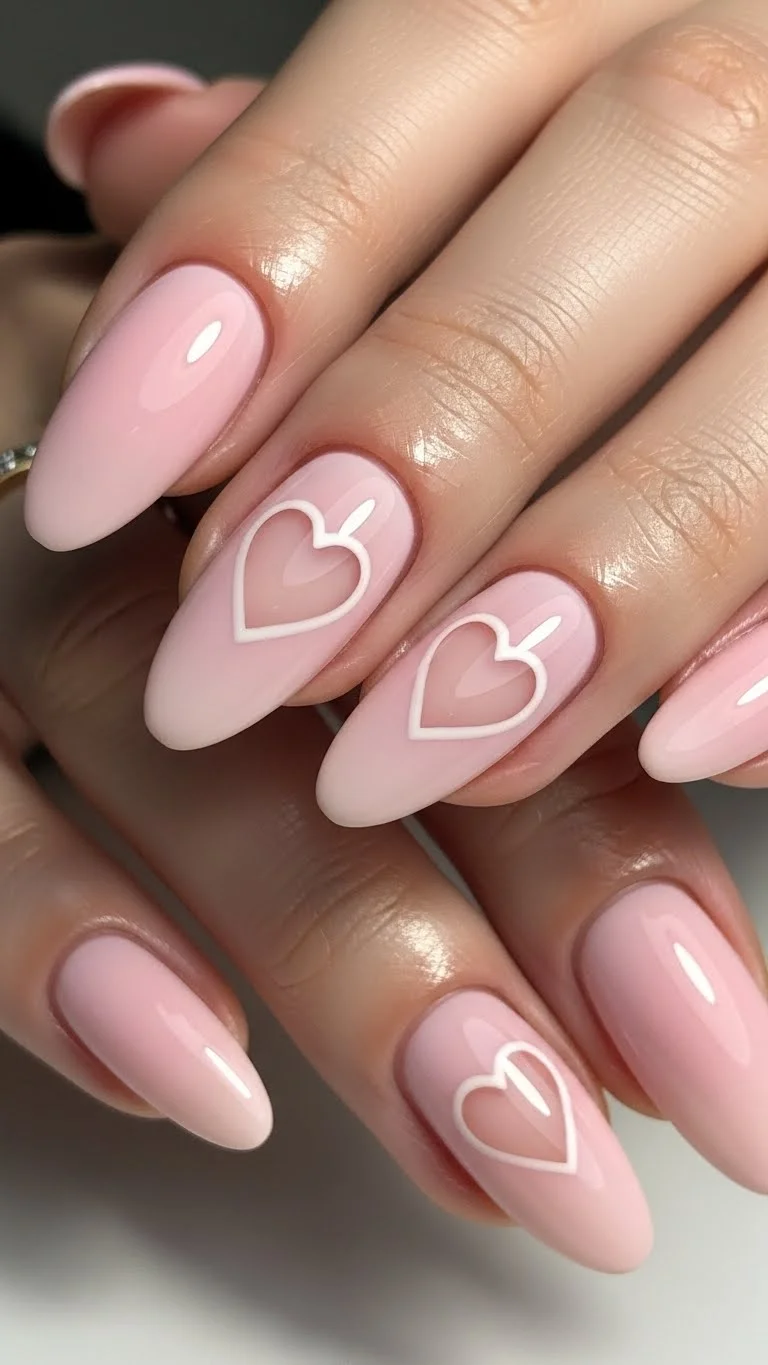
Negative space designs use your natural nail as part of the art. Place a heart-shaped sticker in the center of your bare nail. Paint over the whole nail with your favorite Valentine’s shade. Peel the sticker off while the polish is still slightly tacky. You are left with a perfect heart “window.” This look is great because growth at the cuticle is less noticeable. It lasts longer than a full-color manicure. You can buy heart stickers at any craft store for very little money. It looks like a high-end graphic design with minimal effort.
- Soft Lavender Love
Valentine’s Day doesn’t always have to be red or pink. Lavender is a peaceful, trendy alternative. It feels like an early hint of spring. Pair lavender nails with a small white or silver accent. This color looks particularly good on cooler skin tones. If you want to save money, check the “spring” clearance sections for purple shades. A simple cream finish in lavender is enough to stand out. It’s a “cool girl” take on a traditional holiday.
- Gold Foil Accents
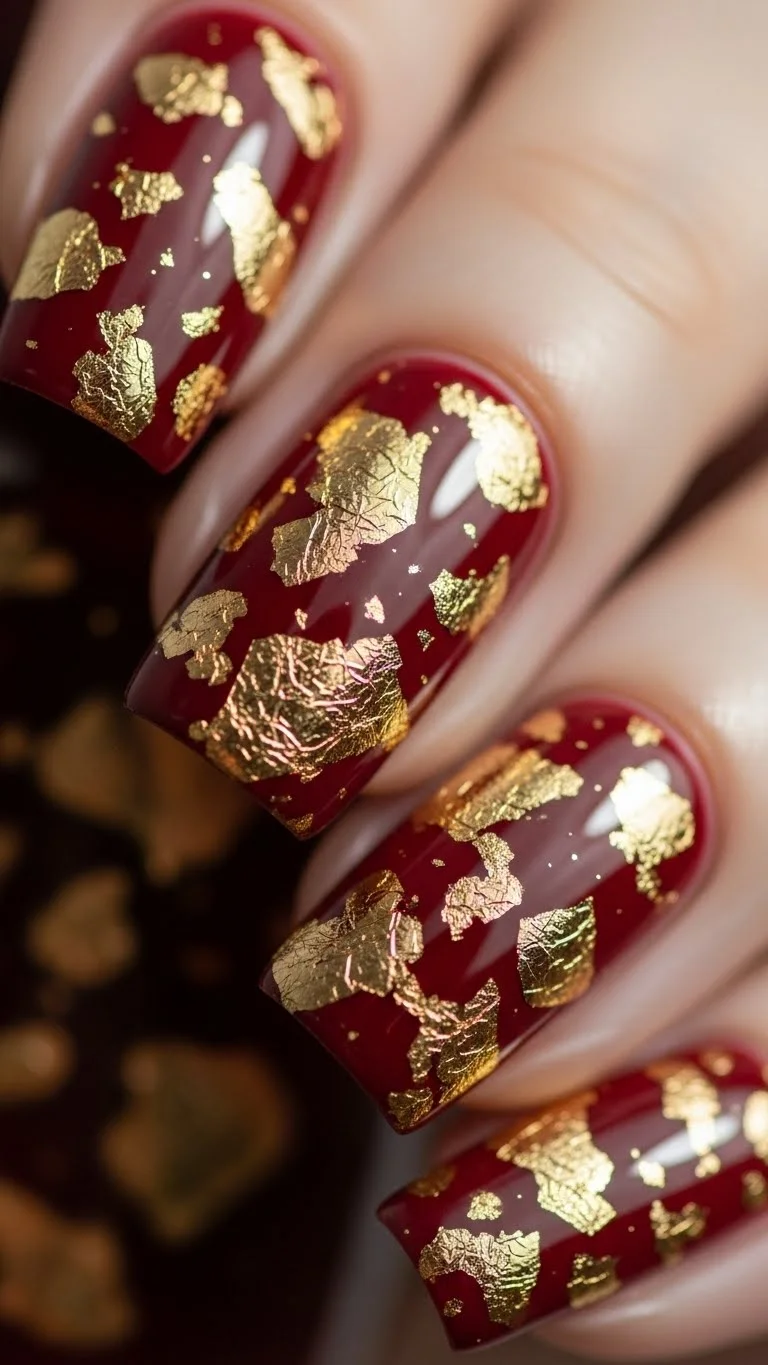
Gold foil makes any manicure look like it cost eighty dollars. You can buy a pot of gold leaf flakes for a couple of dollars online. Paint your nails a deep red or pink. While the polish is still sticky, use tweezers to place tiny bits of foil onto the nail. Don’t worry about making it perfect. The irregular shapes are part of the charm. Press them down gently and cover with two layers of top coat. This adds a “royal” feel to your hands. It is much easier than trying to draw straight lines with gold paint.
- Conversation Heart Pastels
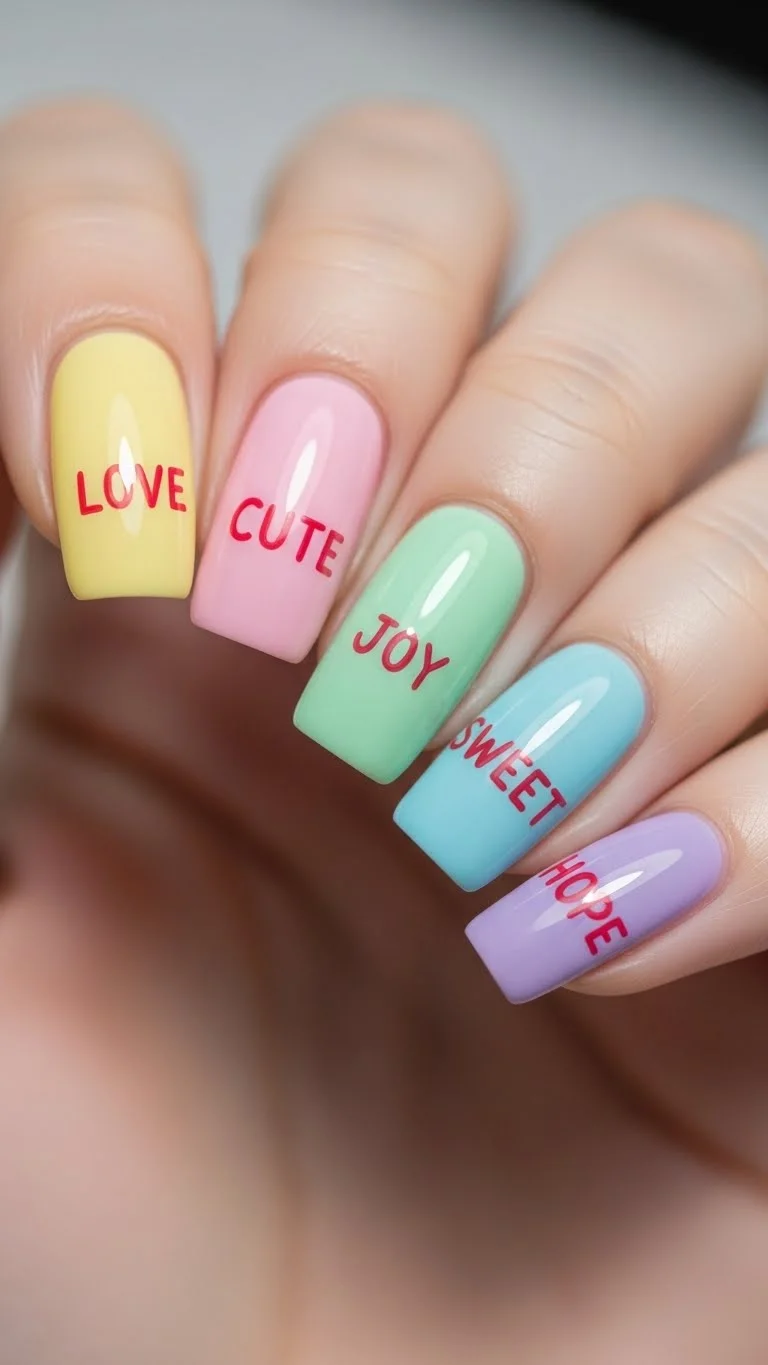
Inspired by the classic candy, this look is nostalgic and fun. Use a different pastel color on each finger. If you have a steady hand, use a fine-liner brush to write short words like “XOXO” or “KISS.” If writing is too hard, just use the pastel colors alone. It creates a “Skittles” nail effect that is very popular on social media. You can use old Easter polishes for this to save money. It’s a cheerful way to celebrate the holiday without being too serious.
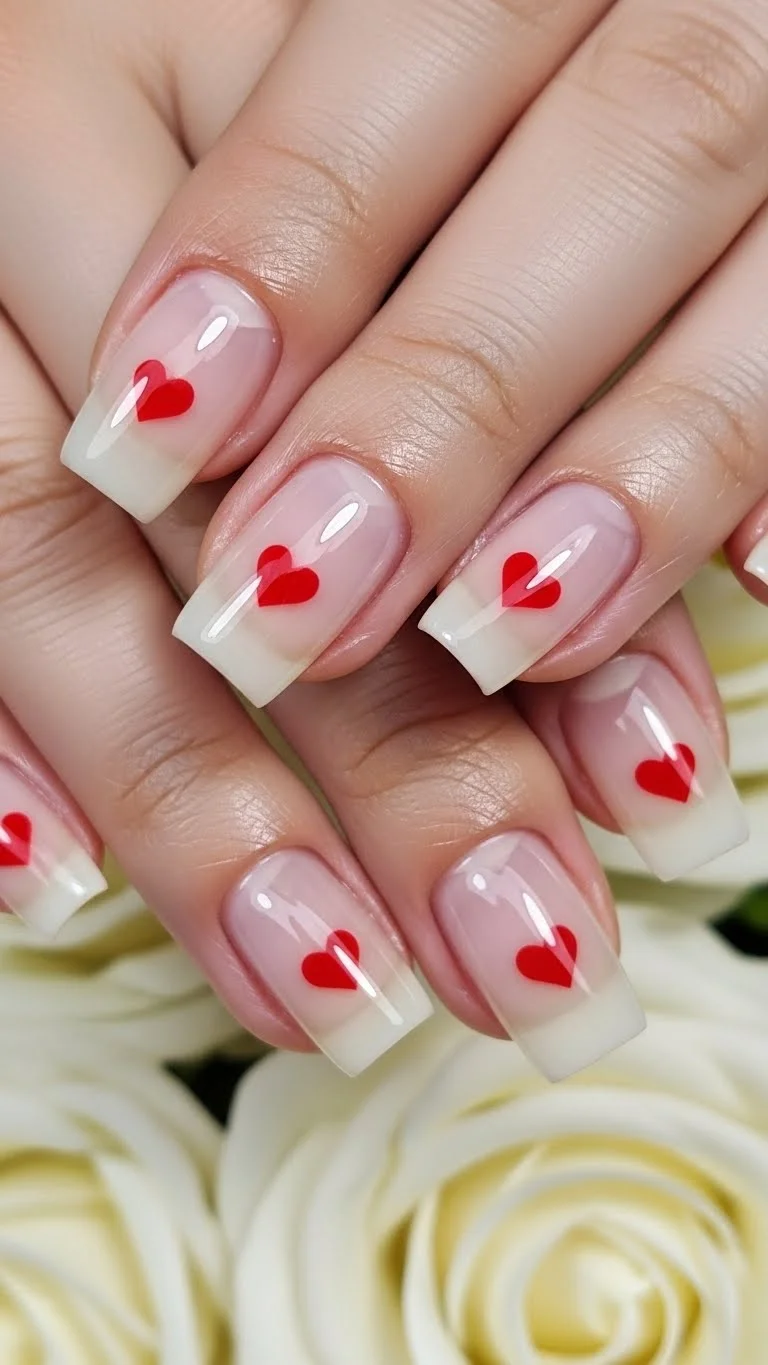
- Subtle Nude with Red Tips
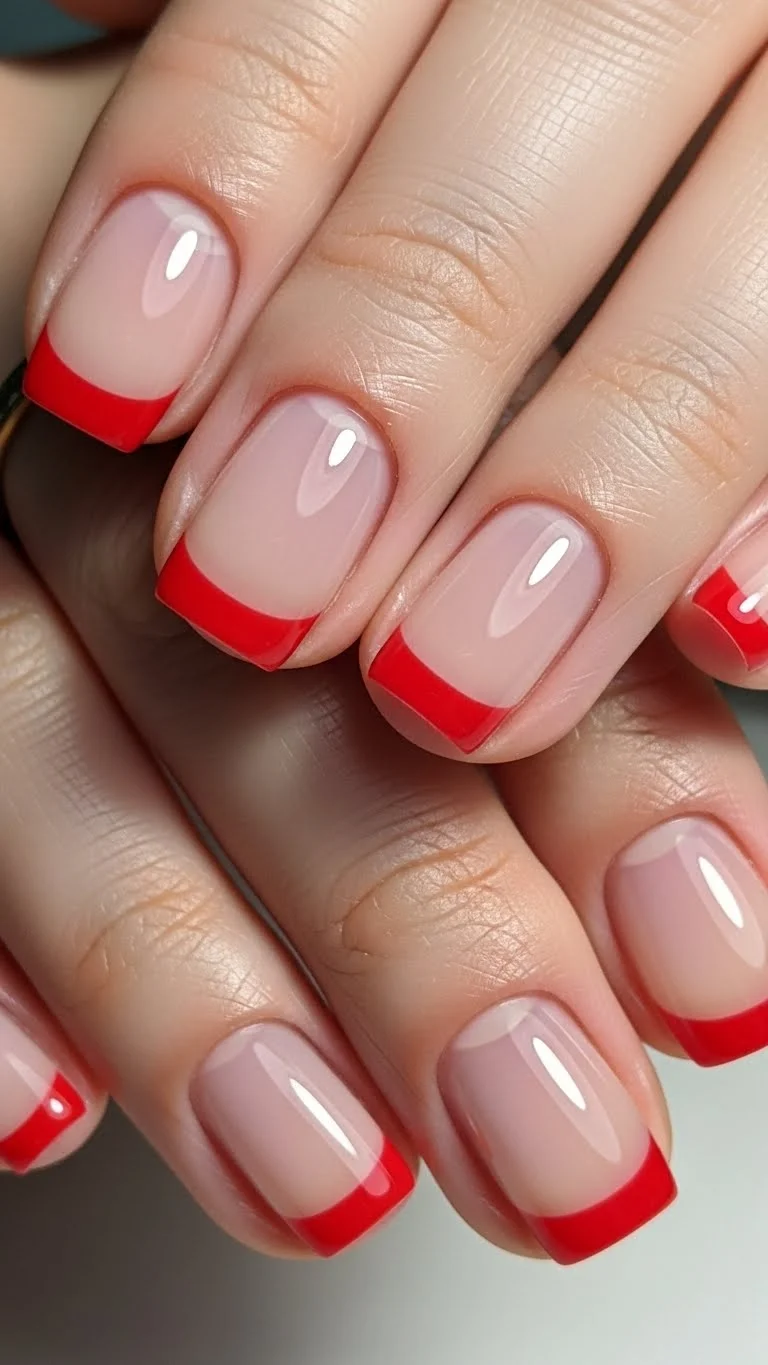
The “micro-French” is a huge trend. It involves a very thin line at the very edge of the nail. Use a sheer nude polish for the base to make your fingers look longer. Use a striping brush—or even a clean eyeliner brush—to swipe a thin red line across the top. This is the perfect look for people who prefer a professional, understated style. It’s also very easy to fix if a tip chips. You just add a tiny bit more red. It’s sophisticated and works for any occasion.
- Polka Dot Playfulness
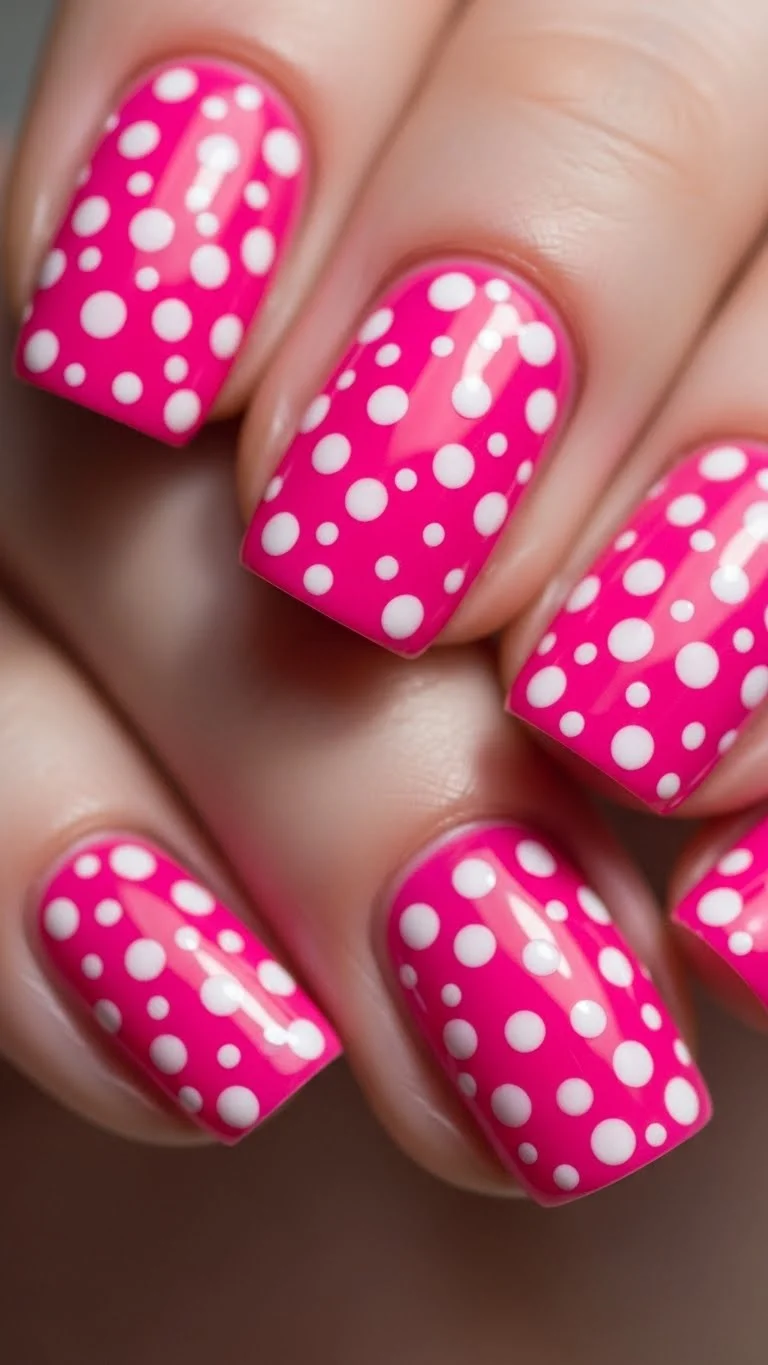
Polka dots are the easiest DIY nail art. All you need is a dotting tool. If you don’t have one, the end of a bobby pin or a toothpick works perfectly. Paint a solid base of hot pink or red. Dip your tool into a contrasting color and tap it onto the nail. You can do a random pattern or a neat grid. This look is very forgiving. Even if the dots aren’t perfectly round, it still looks intentional and cute. It’s a great activity for a night in.
- Shimmering Pearl Finish
![]()
The “glazed donut” look is still going strong. For Valentine’s, try a pearl white with a pink shift. You can find “iridescent” polishes at most drugstores. These polishes are usually sheer, so apply two or three coats. They glow when the light hits them. This style hides chips and scratches better than solid colors. It is a low-maintenance option that still feels special. It pairs beautifully with silver jewelry.
- Chocolate Box Brown

Brown is a “new classic” for Valentine’s Day. It represents the boxes of chocolate we love. A rich, dark cocoa shade looks expensive and modern. Add a single pink heart to the ring finger to make it festive. This is a great choice if you prefer neutral tones over bright colors. Brown polish also tends to look very sleek on shorter nail lengths. Use a high-shine top coat to make it look like real melted chocolate.
- Marble Pink Swirls
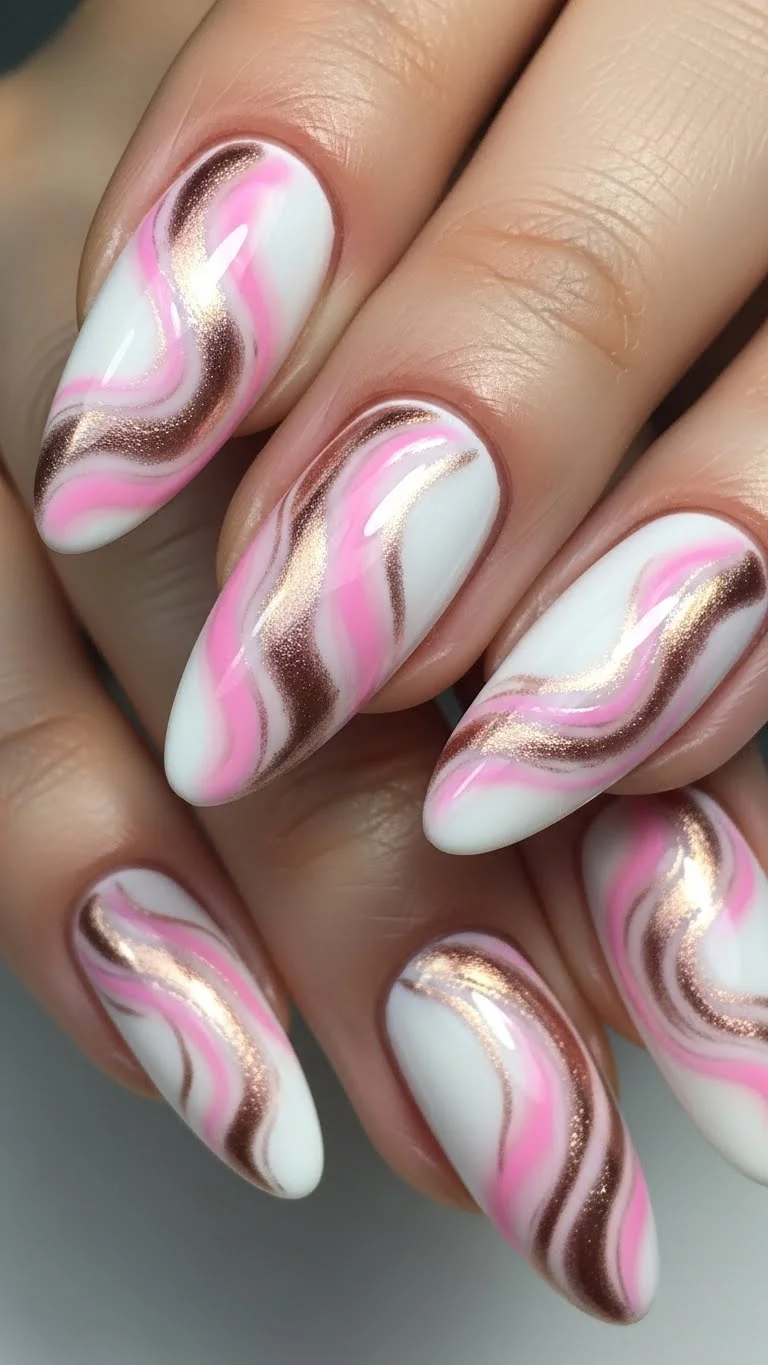
Marble nails look like they require a professional artist, but you can do them at home. Put a few drops of pink and white polish into a small cup of water. Swirl them gently with a toothpick. Dip your nail into the pattern. This is called water marbling. It’s a bit messy, so put tape around your skin first. The result is a unique, abstract design on every finger. It’s a creative way to use up half-empty bottles of polish.
- Velvet Effect Pink
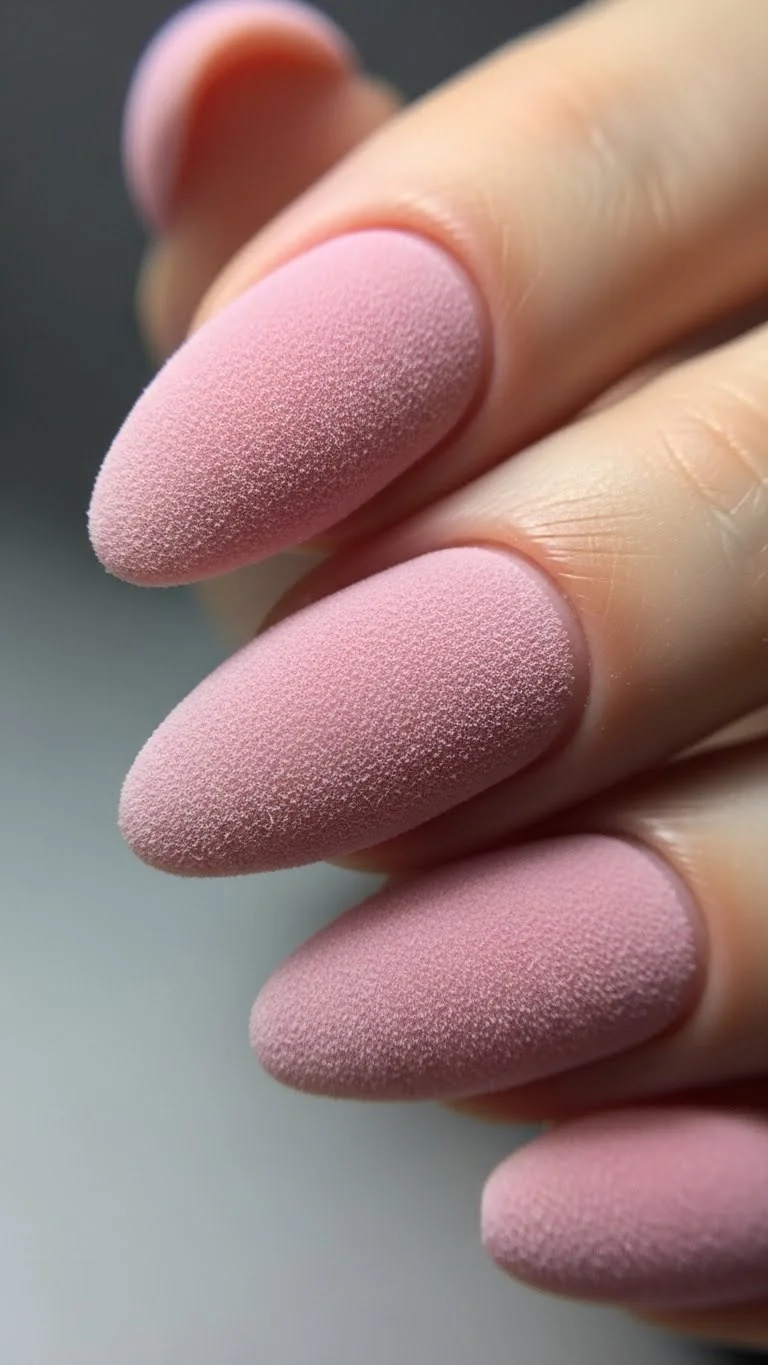
Velvet nails use a special “cat-eye” or magnetic polish. When you hold a magnet over the wet polish, the particles move to create a shimmering, 3D effect. You can find magnetic polish sets for a reasonable price. They usually come with the magnet included. It creates a deep, multi-dimensional look that changes as you move your hands. A soft rose or magenta velvet is perfect for a romantic evening.
- Abstract Color Blocks
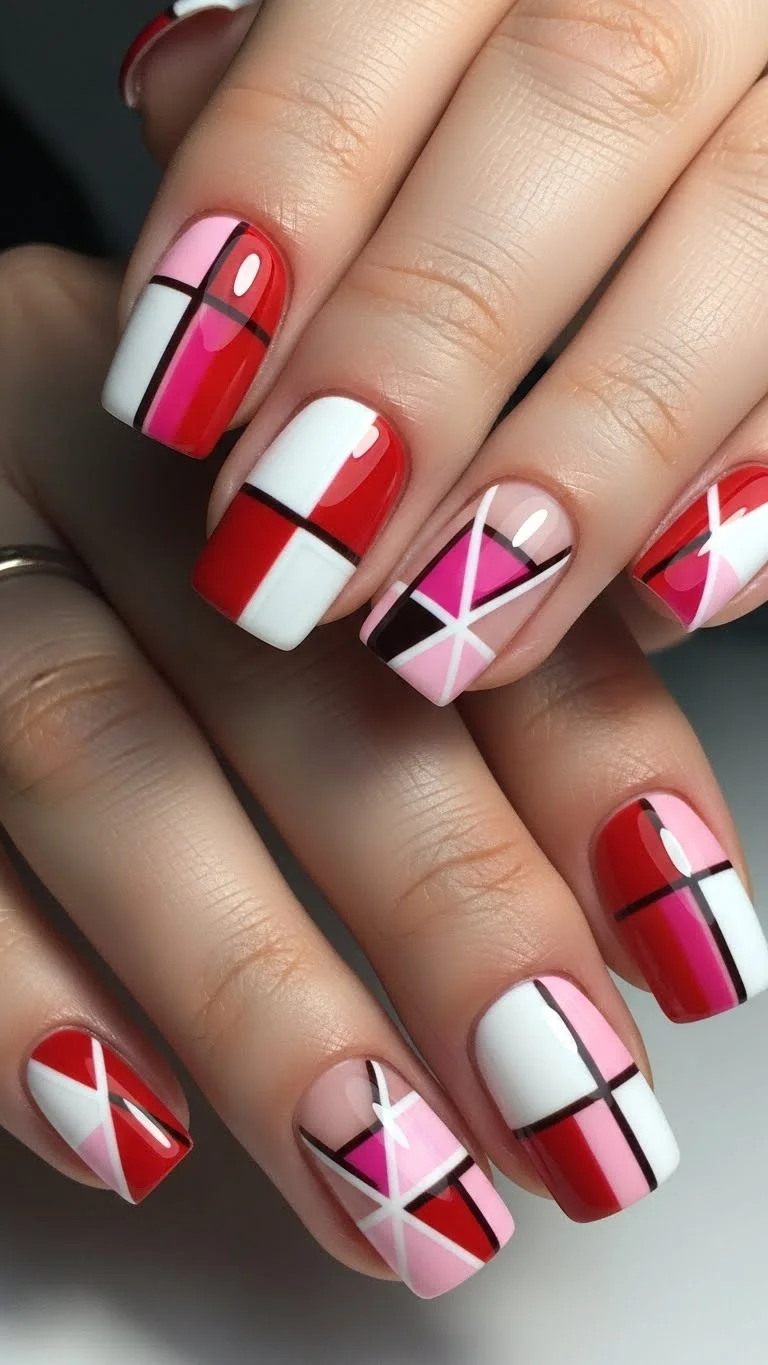
If you like modern art, try color blocking. Use washi tape to create straight lines or triangles on your nails. Paint one section red and another pink. Peel the tape away to reveal clean, sharp edges. This looks very high-end and intentional. It’s a great way to use a variety of colors without it looking messy. Stick to three colors for the best results.
- Floating Hearts
This look uses a clear base to make the hearts look like they are hovering. Use a small brush to paint hearts of different sizes across the nail. Keeping the background clear makes the design feel “airy” and light. This is a great option if you don’t want to commit to a full-color manicure. It’s also very easy to grow out because there is no color at the cuticle.
- Sparkly Accent Finger
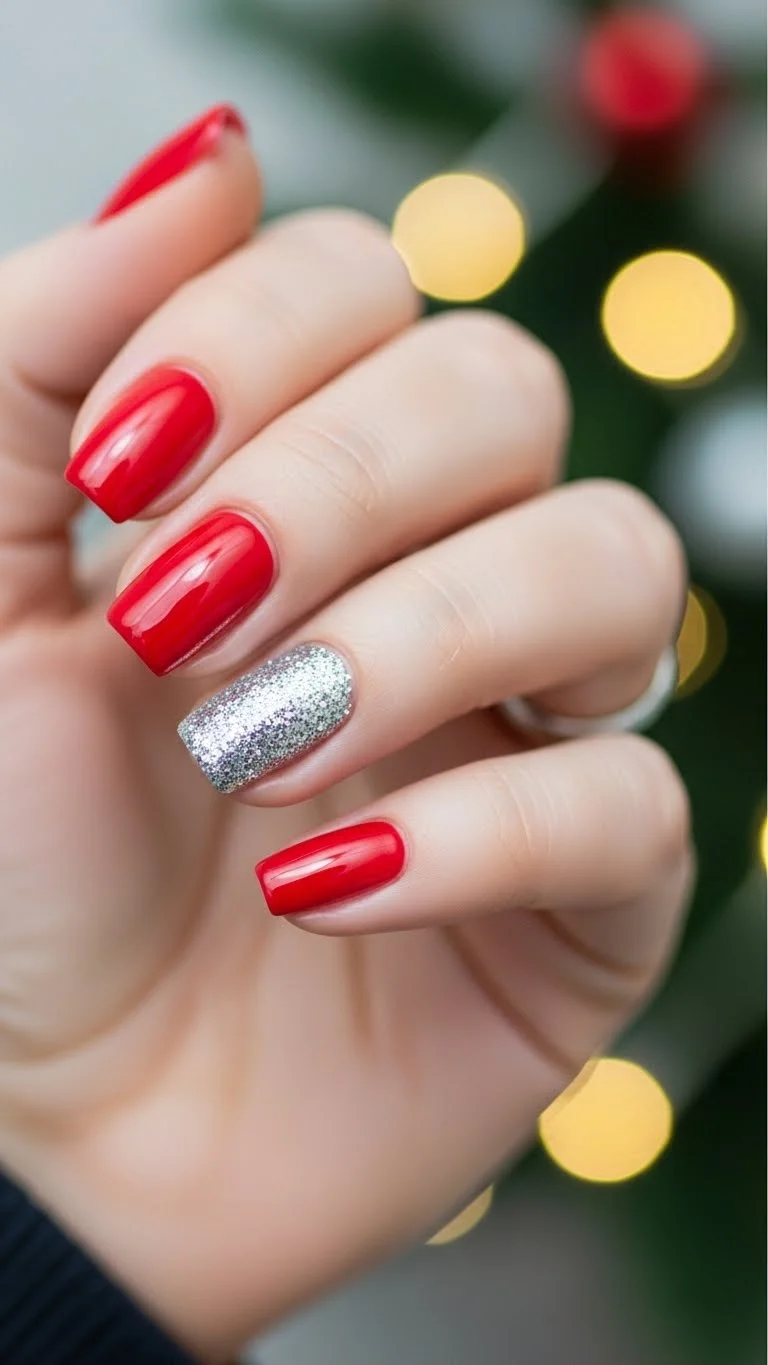
The “accent nail” is a classic for a reason. It is the easiest way to add flare. Paint nine nails a solid Valentine’s color. Cover the ring finger in a dense glitter polish. For the best glitter coverage, dab the polish on with a makeup sponge instead of brushing it. This packs the glitter tightly together. It’s a quick way to upgrade a basic manicure in five minutes.
- Double French Tip
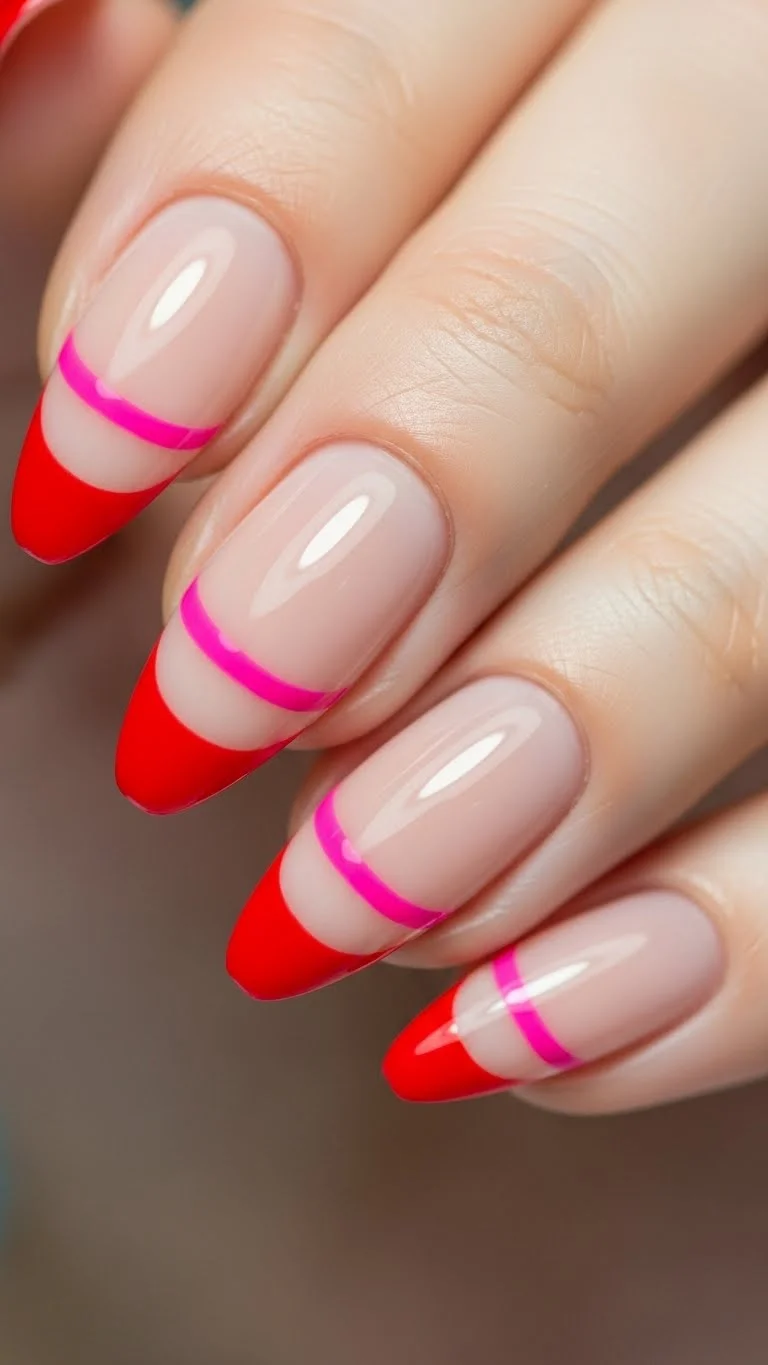
The double French uses two thin lines instead of one. Paint a red line at the very tip, then a pink line right below it. This requires a bit of a steady hand, but you can use a nail art pen to make it easier. Pens are much easier to control than brushes. This style is trendy and adds a bit of architectural interest to your hands.
- Rose Gold Chrome
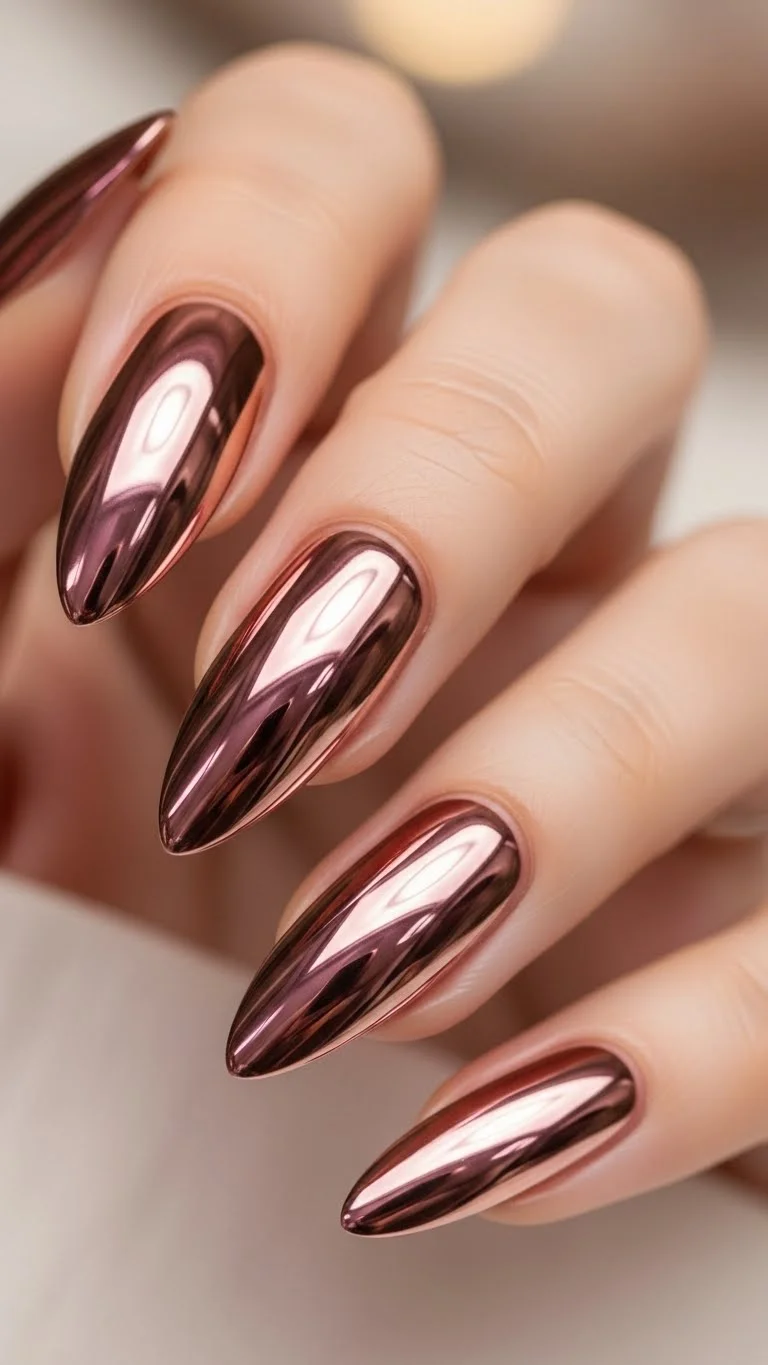
Rose gold is the ultimate romantic metal. Similar to red chrome, you can use a powder or a metallic polish. It’s softer than bright red but more exciting than plain pink. This color looks great on all skin tones. It’s a “safe” choice that still feels very festive. Pair it with rose gold rings for a coordinated look.
- Subtle Heart Cut-outs
This is another negative space trick. Instead of a large heart, put a tiny heart sticker at the base of your nail. Paint the rest of the nail a bold color. When you remove the sticker, you have a “peek-a-boo” heart. It’s a sophisticated detail that people will only notice when they look closely. It’s a great conversation starter.
- Cherry Blossom Pink
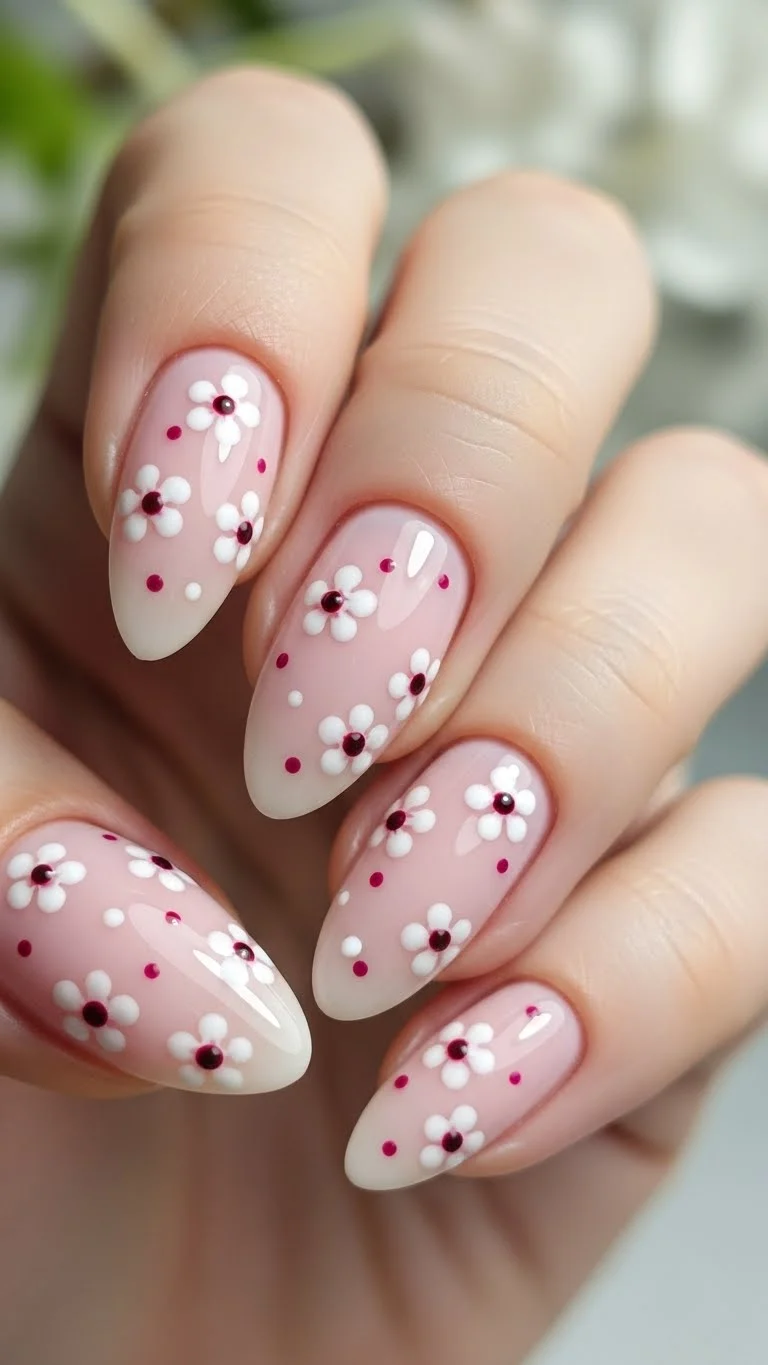
Floral patterns are a sweet alternative to hearts. Use a dotting tool to create five dots in a circle for petals. Put a different color in the center. This “cherry blossom” look is perfect for a soft, feminine Valentine’s vibe. It’s very easy to do and looks much more complicated than it actually is.
- Black and Red Gothic Romance
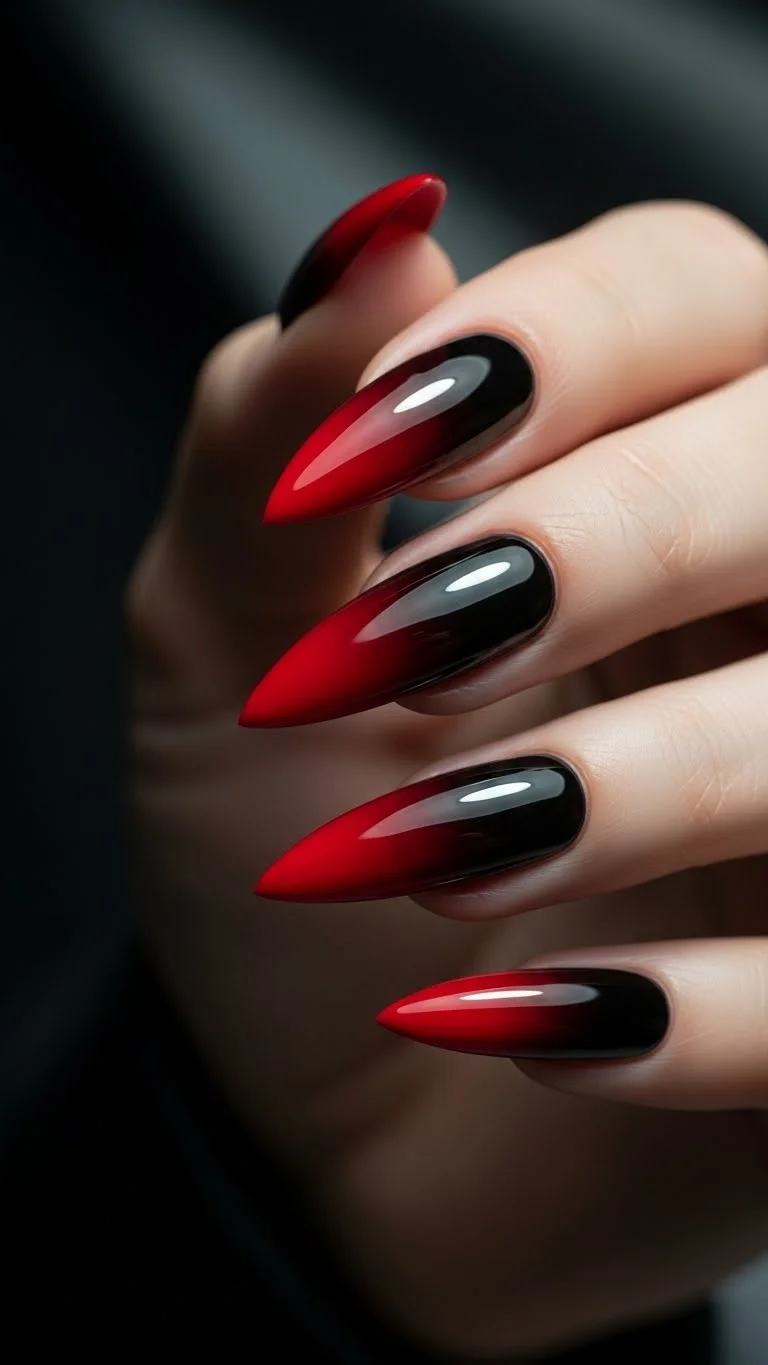
For those who prefer an “edgy” look, black and red is a powerful combo. Try a black base with a red ombre at the tips. This “vampy” style is perfect for a night out. Use a sponge to blend the colors where they meet. It’s a dramatic take on the holiday of love.
- Dried Flower Encapsulation
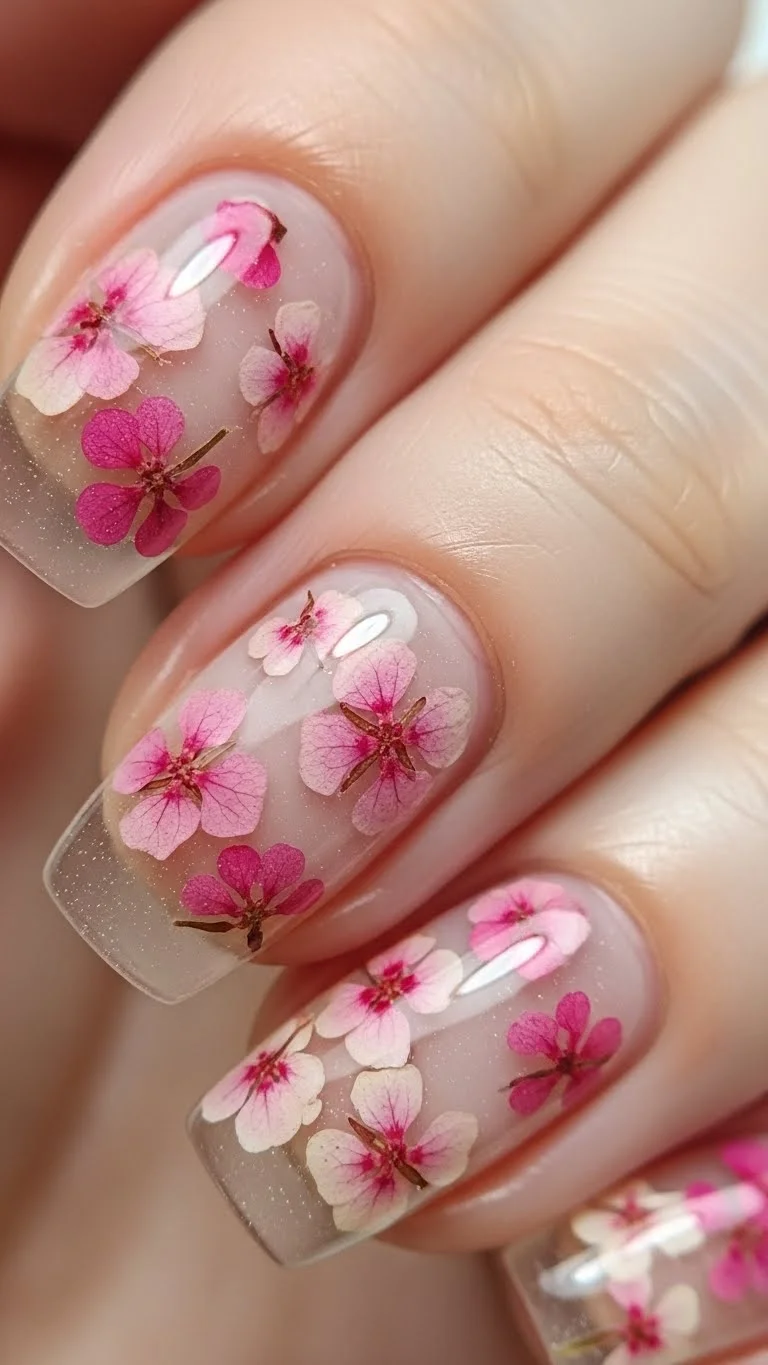
You can buy tiny dried flowers specifically for nails. Paint a clear base, place the flower with tweezers, and seal it with a thick top coat. It looks like a botanical garden on your fingers. This is a very “aesthetic” look that is popular on social media. It’s surprisingly affordable if you buy the flowers in bulk.
- Holographic Heart Glitter

Many brands sell “topper” polishes that already contain heart-shaped glitter. This is the ultimate “lazy” DIY. Just swipe it over your natural nail or a solid color. You might need to “fish” the hearts out of the bottle with a toothpick to place them exactly where you want. It’s instant nail art in one step.
Conclusion
Getting your nails ready for Valentine’s Day is a simple way to feel festive and put-together. You don’t need a professional salon or expensive tools to achieve these looks. With a few basic items like toothpicks, sponges, and affordable drugstore polishes, you can create stunning art at home. Pick your favorite design, take a screenshot, and enjoy a little creative time for yourself. Your hands deserve the love!